Derry Clarke is an Irish celebrity chef and restaurant owner L'Ecrivain. He has also served as a reality TV judge, having acted as a judge alongside Bibi Baskin and Sammy Leslie on the RTÉ reality television series One Fáilte Towers, and has appeared on other shows such as Restaurants. wiki
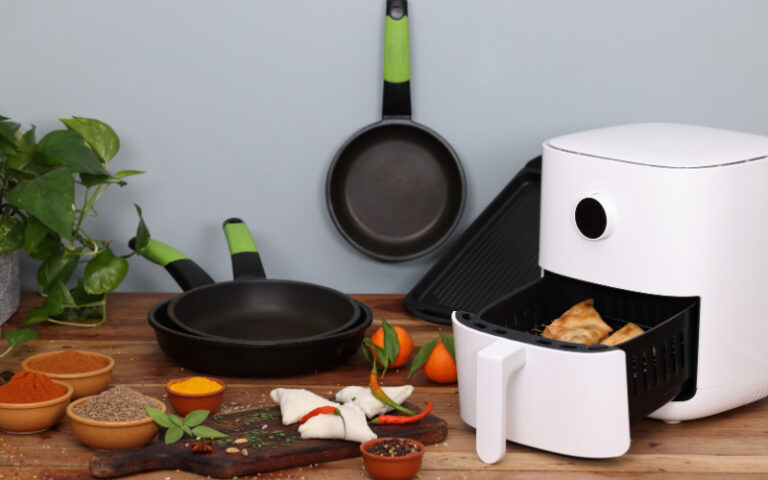
General Tso’s air-fried chicken recipe is one of many delicious recipes you should try. And if you already own a high-quality oil-free fryer, you can prepare this dish yourself. You’ll get to enjoy a tasty meal with a crispy texture, bold flavours, and a unique sauce. What’s particularly special is that you can complete this dish in just about 30 minutes or even less using an oil-free fryer, so you can save a lot of time. In the article below, we’ll guide you on how to make this unique air-fried General Tso’s chicken!
Air Fryer General Tso’s Chicken Recipe
Ingredients
– 500g chicken thighs, cut into 1-inch pieces – 1 tbsp minced ginger – 2 tbsp minced garlic – 2 tbsp white wine – 2 tbsp soy sauce – 1 tbsp sugar – 1 tbsp sesame oil (plus 1 tsp for frying) – 1 tsp chili powder – 1 tsp salt – 1 tsp chicken bouillon powder – 1 tsp baking soda – 1 cup all-purpose flour – 1 cup cornstarch
Instructions
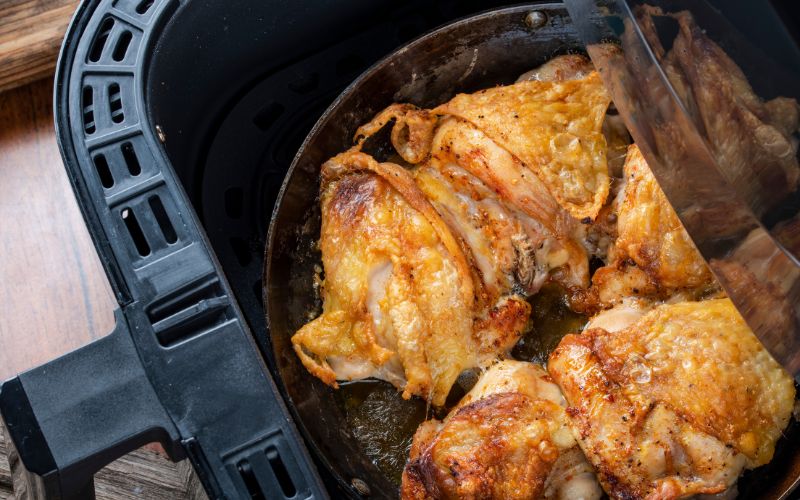
Step 1: In a bowl, combine chicken, ginger, garlic, wine, soy sauce, sugar, 1 tbsp sesame oil, chilli powder, salt, bouillon powder and baking soda. Marinate for 30 minutes. Step 2: In another bowl, mix together the flour and cornstarch. Dredge marinated chicken in flour mixture until fully coated. Step 3: Preheat the oil-free fryer to 360°F. Add 1 tsp sesame oil. Step 4: Working in batches, add coated chicken to the air fryer basket in a single layer. Cook for 10 minutes. Flip the chicken and cook 10-15 minutes more until golden brown and crispy. Step 5: Once the chicken is golden and crispy, remove it from the oil-free fryer and garnish it according to your preference. You can serve this General Tso’s Chicken with steamed rice or noodles for a delicious meal.
With Air Fryer General Tso’s Chicken Recipe, you can enjoy a flavorful and crispy dinner right at home without the need to go to a restaurant. Rest assured that your whole family will love this air-fried General Tso’s chicken!
Derry Clarke is an Irish celebrity chef and restaurant owner L’Ecrivain. He has also served as a reality TV judge, having acted as a judge alongside Bibi Baskin and Sammy Leslie on the RTÉ reality television series One Fáilte Towers, and has appeared on other shows such as Restaurants.
Air Fryer Apple Chips Recipe stand out as a deliciously simple and nutritious option. This easy recipe transforms everyday apples into a crispy, irresistible snack. Perfect for health-conscious individuals and snack lovers alike, these apple chips offer a guilt-free way to satisfy your cravings. The simplicity of this recipe and its health benefits make it an excellent choice for a quick and healthy snack!
Ingredients
Apples (preferably Granny Smith or Honeycrisp for their crisp texture).
Cinnamon (optional, for a hint of warmth and spice).
Sugar or a sugar substitute like stevia (optional, for those who prefer a sweeter taste).
Instructions
Step 1: Start by thoroughly washing the apples. Core them and slice them thinly, about 1/8 inch thick – this ensures they crisp up perfectly in the air fryer.
Step 2: For added flavour, lightly sprinkle cinnamon and sugar or a sugar substitute over the apple slices. This step is customizable – you can either amp up the flavour or keep it natural.
Step 3: Place the seasoned apple slices in a single layer in the air fryer basket. Set the air fryer to 350°F (175°C) and cook for about 8-10 minutes. Remember to flip the slices halfway through to ensure even cooking.
Step 4: Once done, remove the apple chips from the air fryer and let them cool. They will crisp up more as they cool.
Nutritional Information
Air fryer apple chips are a low-calorie, no-fat snack that retains much of the natural nutrients of apples. The use of minimal to no added sugar makes them a much healthier option compared to processed snacks. Apples are naturally sweet, high in fiber, and contain vitamins and antioxidants, making these chips a nutritious and delicious treat.
Conclusion
This Air Fryer Apple Chips recipe is the epitome of easy, healthy, and tasty snacking. Whether you’re looking for a quick snack for the kids, a healthy option to curb your mid-day cravings, or a simple and nutritious treat, these apple chips are a perfect choice. Try this recipe today and share your experience in the comments. Happy snacking!
Derry Clarke is an Irish celebrity chef and restaurant owner L’Ecrivain. He has also served as a reality TV judge, having acted as a judge alongside Bibi Baskin and Sammy Leslie on the RTÉ reality television series One Fáilte Towers, and has appeared on other shows such as Restaurants.
Welcome to a fascinating article exploring the seamless fusion of an air fryer and a wooden countertop within your kitchen space. Throughout this informative journey, we’ll delve into the air fryer’s health benefits, rapid cooking capabilities, and the protective potential it holds for your cherished wooden surface. However, placing an air fryer on a wooden countertop is not solely about aesthetics; it safeguards the wood’s character from the impact of high temperatures. We’ll share astute methods for confidently utilizing an air fryer without fretting over potential effects on your wooden tabletop. So, the question arises: Can You Put An Air Fryer On A Wooden Surface?
Join us as we embark on this enlightening expedition!🥰
Is it safe to put an air fryer on a wooden surface?
Placing an air fryer on a wooden countertop is not recommended due to the possible heat damage it can cause. While wooden tabletops are typically crafted from high-quality and treated wood, the presence of an air fryer can expedite changes.
The heat emitted from the air fryer can crack the wood and induce warping and surface burns. The deformation of a wooden countertop compromises the visual appeal of the kitchen.
Therefore, if the need surfaces to position an air fryer on a wooden countertop, it is imperative to ensure that the surface is protected enough. It’s worth noting that prolonged use of an air fryer on wooden countertops can lead to cracks over time. Exercising caution while using the air fryer is essential to maintain the integrity of your wooden surfaces.
Risk of heat damage to wooden surfaces
Heat Exposure
Air fryers use heat as a cooking oil substitute, offering a healthier choice for preparing meals. This innovative approach ensures dishes are cooked without extra grease, yielding outcomes akin to traditional frying methods.
Beyond health benefits, air-fried food retains the same delicious appeal as its oil-fried counterparts. However, it’s crucial to note that the substantial heat generated by air fryers during cooking can pose a risk when placed on surfaces like wooden tables.
Surface Discoloration and Burns
Positioning an air fryer on a wooden tabletop may result in a visible brown stain resembling a burn mark on the surface. This discoloration stems from residual heat retained by the tabletop after using the air fryer. While remedying the warped appearance, taking preventative measures is advisable.
To avert surface burns, consider shielding the wooden tabletop using a heat-resistant cover or placing the air fryer on a metal tray to hinder heat transfer to the countertop.
Potential for Cracks
Extended usage of an air fryer on wooden countertops can lead to surface cracks. It occurs when the heat emitted by the air fryer permeates the wood, inducing damage over time. Intense heat from the appliance could even cause the wood surface to deteriorate.
Detection of cracks signifies that the wooden surface is struggling to endure the heat. To prevent such occurrences, it’s essential to proactively safeguard the countertop before air fryer usage to preserve its integrity.
Risk of Melting
Using an air fryer on plastic or laminate countertops may heighten the possibility of surface melting, particularly with frequent and prolonged appliance usage.
To mitigate the risk, ensure proper precautions when employing the air fryer, especially on surfaces vulnerable to melting, to maintain the longevity of your kitchen’s appeal.
How to protect your wooden surface?
If you’re seeking effective methods to shield your table while utilizing an air fryer, consider the following practical options:
Racks or Supports
Employing frames or supports is straightforward yet effective. Placing these items beneath the air fryer before cooking can provide a buffer against the heat, preserving your table’s surface.
Aluminum Foil
Consider placing a reflective aluminum foil underneath the air fryer to prevent potential damage to your countertop. It acts as a barrier against heat transfer.
Silicone Baking Mat
Utilize a silicone baking mat to shield your countertop from elevated temperatures. Position the rug beneath the air fryer before use for an added layer of protection.
Cutting Board
If you possess a sufficiently large cutting board, it can serve as an adequate safeguard. Place it beneath the air fryer to catch any drips or splatters, concurrently shielding the countertop.
Heat-Resistant Mat
Incorporating a heat-resistant mat under the air fryer during cooking introduces an extra shield between the hot appliance and the table surface, minimizing potential heat-related damage.
Incorporating these protective measures can ensure the longevity of your wooden surface while enjoying the benefits of your air fryer.
What to put under the air fryer to protect the countertop?
Your wooden countertop is not inherently heatproof, so concerns arise about placing an air fryer on it, and the possible effects could be significant.
However, the good news is that several effective solutions are available to shield your countertop from the heat emitted by the air fryer, ensuring its protection.
Let’s explore the options for protecting your countertop:
Heat-Resistant Ceramic Tiles
Using heat-resistant ceramic tiles provides a reliable shield for your countertop against the heat of the air fryer. Choose tiles specifically designed to withstand high temperatures. Excitingly, these tiles are both cost-effective and easy to find.
Silicone Heat Pads
Utilizing silicone’s well-documented heat-resistant properties, silicone heat pads offer an effective solution to safeguard your countertop from the air fryer’s heat.
What makes silicone pads unique? Firstly, they are made from food-grade silicone, ensuring safety. These pads are also 1.4mm thick, offering substantial protection against heat.
Heat Protector Mats
Like silicone heat pads, heat protector mats provide an alternative safeguarding option. These mats are often favored due to their secure fit on the countertop, minimizing sliding risks. Moreover, heat protector mats are significantly thicker than silicone pads, delivering comprehensive heat insulation for your countertop. They are particularly suitable for individuals who extensively use their air fryers.
Heat-Resistant
Sealant Heat-resistant sealants reinforce wooden countertops, making them capable of withstanding the heat from air fryers. If your wooden tabletop lacks insulation, placing an air fryer on it can lead to severe consequences. Nevertheless, various solutions exist to protect your countertop from extreme heat.
Where not to put your air fryer in the kitchen?
In addition to knowing where to place your air fryer on a heat-resistant surface, it’s also important to know the places in the kitchen where you shouldn’t put the air fryer. Here are the things you should remember:
Do not place the air fryer in a corner where there is not enough space for heat dissipation at least five inches away from the wall to prevent the wall from being damaged by heat from the air fryer.
Do not place the air fryer on the stove. You could accidentally turn on the stove and cause damage to the air fryer.
Never place the air fryer in the refrigerator while you are using it or if it is still hot from the previous cooking time.
FAQs
Will Use an Air Fryer Harm Your Quartz Countertop?
Quartz surfaces are known for their durability and non-porous nature, making them generally resistant to the heat emitted by air fryers. However, it’s essential to consider the quality of the quartz material.
Consequently, while high-quality quartz can easily withstand heat, the same may not be accurate for lower-quality variants. The heat generated by the air fryer could cause damage to quartz countertops of inferior quality.
Pro Tip: Remember that quartz has a certain degree of heat resistance. Some premium quartz countertops can handle temperatures up to 400 degrees Fahrenheit.
Nonetheless, using a heat-resistant countertop mat or another protective layer between the air fryer and your quartz countertop is wise. This precautionary measure will effectively safeguard your countertop against heat-related damage from the air fryer.
Can an Air Fryer Harm a Granite Countertop?
Placing your air fryer on a granite countertop is generally safe due to the sturdiness of granite surfaces. Granite countertops can endure moderate levels of heat.
However, it’s advisable to consider additional protection, such as using a heat-resistant mat or similar materials. By placing a heat-resistant mat between your air fryer and the granite countertop, you can effectively shield it from any potential damage caused by heat over time.
Pro Tip: Introducing a heat-resistant mat maximizes heat protection and enhances stability during the air fryer’s usage.
Is It Safe to Put an Air Fryer on a Stovetop?
No, placing an air fryer on a stovetop is not recommended under any circumstances. Avoid this placement even if you don’t intend to operate the air fryer while it’s on the stovetop.
The reason behind this caution is the substantial risk involved. The intense heat from a hot stovetop can melt the air fryer, leading to damage. Furthermore, a melted air fryer could trigger a fire, jeopardizing your property and safety.
Hence, resisting the temptation to position an air fryer on a stovetop is imperative. The associated risks are too significant to ignore, and you should neither take this risk nor recommend it to others.
Derry Clarke is an Irish celebrity chef and restaurant owner L’Ecrivain. He has also served as a reality TV judge, having acted as a judge alongside Bibi Baskin and Sammy Leslie on the RTÉ reality television series One Fáilte Towers, and has appeared on other shows such as Restaurants.
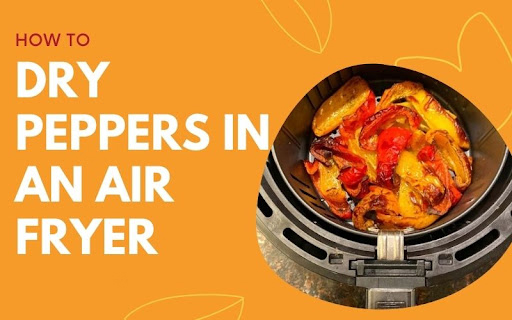
Welcome to our blog, Big Sun Cook! Today, we are excited to share a quick and easy method for drying peppers using an air fryer. Not only does this oil-free fryer cook food rapidly, but it also serves as an excellent tool for drying peppers without excessive grease.
Dried peppers are incredibly versatile. They can be used to season various dishes, add vibrant colors to garnishes, spice up spices, and even enhance the flavors of instant noodles. Thanks to the air fryer, drying peppers has become quicker and simpler than ever before.
In this article, we will provide you with a step-by-step guide on how to dry peppers in an air oven. You will learn how to prepare the peppers and adjust the air fryer for optimal results. We will also share valuable insights on the ideal time and temperature, selecting the right type of chili, and other useful tips for successfully air-drying peppers!
Why Should You Dry Peppers in Air Fryer?
Drying peppers in an oil free fryer is not recommended. Oil less fryer are mainly used for cooking food with hot air to create a crispy texture, not for drying. There are better options for drying peppers due to a few reasons:
Uneven drying: Oil less fryers are designed to evenly cook food, but drying peppers requires consistent airflow and low humidity, which an air fryer may not provide.
Moisture retention: Peppers contain moisture and proper drying needs a controlled environment with low humidity. Air fryers are not specifically designed for dehydrating food, so they may not effectively remove water from peppers, leading to insufficient drying and affecting the quality and shelf life of the peppers.
Limited capacity: Oil less fryers have limited space, typically suitable for smaller food quantities. Drying peppers often requires larger amounts, especially when preserving a large harvest or for future use. The limited capacity of an air fryer may make it impractical to dry a significant amount of peppers.
Instead, it is generally advised to use alternative methods such as air drying, oven drying, or using a specialized food dehydrator to dry peppers. These methods offer better control over the drying process, ensuring consistent airflow, reduced humidity, and proper moisture removal from the peppers.
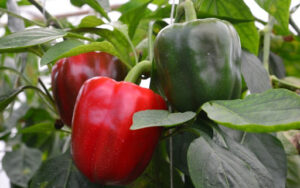
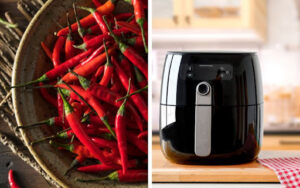
What types of chilies to dry?
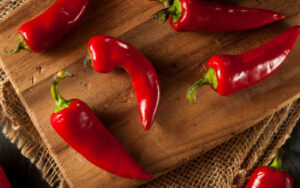
Drying chilies in an oil less fryer can be a convenient and efficient method. Some chili varieties that work well for air frying include serrano peppers, Thai chilies, Cayenne peppers, and red Fresno peppers.
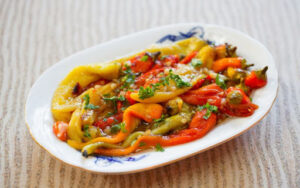
Bell peppers are not typically dried due to their high water content and thick flesh but you can still use an oil less fryer to roast them for a delicious and versatile culinary application.
Preserving the spiciness of serrano peppers is possible by drying them in an oil-free fryer. This allows you to use them as chili flakes or powders in various recipes.
Thai chilies(pepers) are small but extremely hot, making them a popular choice for adding fiery heat to dishes. Air drying them in an air fryer helps intensify their spiciness.
Cayenne peppers are known for their medium to high heat levels. Drying them in an oil-free fryer is an excellent way to preserve them for future use. Once dried, you can grind them into a fine powder or crush them into flakes to add heat to different recipes.
Red Fresno peppers can also be dried in an oil-free fryer. The resulting chili flakes or powders can be sprinkled on pizzas or added to soups for an extra kick.
How to dry chilies in an air fryer
Let me provide you with an expanded version of the steps for drying peppers in an oil less fryer, highlighting the benefits of using an oil less fryer for this process:
Step 1: Prepare the ingredients and tools
Gather your favorite type of fresh peppers and an air fryer. Rinse the peppers with cold water and pat them dry with a paper towel.
Step 2: Prepare the peppers
Cut off the stems of the peppers and remove the seeds inside (based on your preference).
Next, cut the peppers into small pieces, thin slices, or leave them whole, depending on the type of pepper and your desired preparation.
Step 3: Dry the peppers in the air fryer
Turn on the air fryer and set the temperature to about 180-200°C (350-390°F).
Wait for the air fryer to preheat to the desired temperature.
Place the pepper pieces into the air fryer basket. Ensure they are spread out evenly and not stacked on top of each other.
Cover the air fryer and dry the peppers for about 5-7 minutes. The drying time may vary depending on the size and thickness of the peppers.
Step 4: Finishing touches and storage
Once the peppers have dried and become crisp, turn off the air fryer.
Use tongs or a spoon to transfer the dried peppers from the air fryer basket to a plate or storage container. Allow the peppers to cool completely before storing them in an airtight container.
You can use the dried peppers as a flavorful addition to your dishes or crush them into flakes for seasoning.
These revised steps will guide you through the process of drying peppers in an air fryer, resulting in crispy and preserved peppers without the need for oil. Enjoy the convenience and rich flavor of dried peppers in your cooking!
Tips and Warnings on How to Dry Peppers in Air Fryer
Drying peppers in an air fryer is an easy way to keep their taste. Here are some key reminders and cautions:
Tip
Warning
Choosechili peppers with thin flesh and little water.
Make sure there is enough ventilation to avoid irritation from strong scents.
Wash and dry the peppers before slicing.
Wear gloves when handling hot peppers.
Set the temperature of the air grill to low (about 120°F to 140°F or 50°C to 60°C).
Avoid putting too many peppers in the air grill basket.
Monitor and rotate the peppers to allow for an even drying.
Be careful with the high level of spiciness once the chili has dried.
Test the dryness by crushing the chili easily.
Store dried peppers in an airtight jar and in a cool, dry place.
Final thoughts
Our above article Big Sun Cook, has explained to you how to fry pepper in an air fryer. We hope you can make your own delicious chilies. Thank you for reading our article. If you have any questions, please leave a comment below the article and we will try to answer quickly as possible!
Derry Clarke is an Irish celebrity chef and restaurant owner L’Ecrivain. He has also served as a reality TV judge, having acted as a judge alongside Bibi Baskin and Sammy Leslie on the RTÉ reality television series One Fáilte Towers, and has appeared on other shows such as Restaurants.
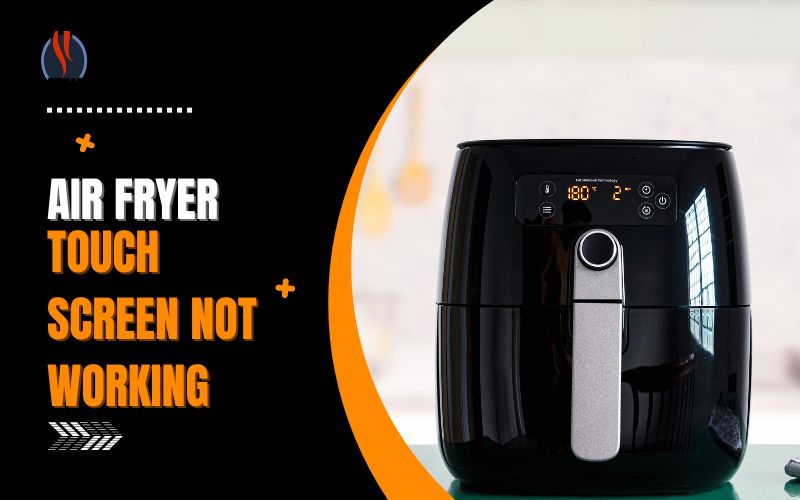
Have you ever experienced a situation where your air fryer touch screen becomes unresponsive? It can be frustrating when you’re excited to cook a yummy meal but unable to make changes to the settings. However, there’s no need to worry as this article is here to assist you in understanding the causes and providing solutions to overcome this issue. We’ll discuss how to fix the air fryer touch screen not working, ensuring that you can enjoy the delicious meals that an air fryer has to offer without any difficulties.
3 Common Causes for Air Fryer Touch Screens Not Working
Experiencing a non-functional touch screen on your air fryer can irritate and throw off your cooking plans. Several factors could contribute to this issue, including unresponsive touch inputs, faulty touch keys, and diminished sensitivity. In the following sections, we’ll delve into these potential causes and offer guidance on troubleshooting and resolution. So, let’s explore three common reasons for air fryer touch screens not working:
The fryer touchscreen does not work when interacting
Cause: The touch screen of an air fryer may stop responding to touch inputs, which can cause inconvenience while navigating menus or adjusting cooking settings. This issue may stem from various factors, such as software glitches, calibration problems, or a faulty touch sensor.
How to fix: To resolve this problem, please follow these instructions:
Try restarting the air fryer.
Check for any available firmware updates.
Calibrate the touch screen.
If the issue persists, kindly contact customer support for further assistance.
The air fryer is less sensitive
Cause: If the touch screen on your air fryer is not responding, it could be due to reduced sensitivity. You may need to apply more pressure or try multiple times to register the input on the screen. It can happen when the screen is worn out or when dirt, grease, or food particles accumulate, affecting touch sensitivity.
How to fix: To resolve this problem, you can follow these steps:
Wipe the touch screen clean.
Take off any screen protectors.
Fine-tune the touch pressure.
A faulty air fryer touches key
Cause: If certain sections or buttons on the air fryer touch screen are not responding, it could indicate a malfunctioning touch key. Touch keys can deteriorate or get damaged as time passes, making them stop working correctly. It can hinder your capacity to choose options or give instructions on the air fryer.
How to fix: To fix this problem, follow these steps:
Clean the touch keys.
Check for any physical damage.
Suppose you need more confidence in fixing or troubleshooting the touch screen. In that case, it is advisable to seek help from the manufacturer or experts to prevent further damage to your device.
Some other reasons that could cause for air fryer touch sreen not working
Additional factors that might lead to the malfunctioning of your air fryer’s touchscreen. Understanding the possible causes and appropriate remedies can help restore its functionality. Here, we amalgamate the root reasons with their corresponding solutions:
Common Causes of Air Fryer Touch Screen Problems:
Inadequate Socket Connection: The simple oversight of an improperly connected plug can hinder touchscreen performance.
Damaged Power Socket: If the socket is damaged, it can impede the touch screen’s operation.
Worn or Damaged Cable: Regular movement can lead to cable wear, affecting touchscreen responsiveness.
Blown a fuse: A blown fuse in the power cord can lead to an unresponsive touch screen.
Electrical Instability: Insufficient electricity flow or voltage irregularities can lead to touchscreen glitches.
Obstruction Interference: Objects obstructing the touch screen can disrupt its sensitivity.
Grease Accumulation: Grease buildup on the touch panel can compromise its sensor functionality.
Impact Damage: A fall from a certain height can cause physical damage and result in touch screen issues.
Manufacturing Defects: Technical shortcomings or defects in manufacturing can be underlying causes.
Voltage Overload to Membrane Switch: High voltage can stress the membrane switch, impacting the touch screen’s performance.
Membrane Switch Deterioration: Worn-out wires in the membrane switch can lead to touch screen failure.
Control Board Malfunction: Damage to control board components can hinder touch screen operations.
Subpar or Counterfeit Product: Poor-quality or fake air fryers can cause touchscreen malfunctions.
Memory Card Concerns: Memory card issues can affect display performance in specific air fryer models.
Aging Touch Screen: Over time, touch screens can naturally become less responsive due to wear.
Hygiene Neglect: Regular and proper cleaning is essential to maintain touch screen efficacy.
Practical Strategies to Address Touch Screen Concerns:
Maintain Cleanliness: Routinely clean the touch screen to eliminate grease and debris.
Check and Replug: Ensure a secure plug connection and assess the outlet functionality.
Alternate Socket Testing: Experiment with different sockets to rule out power source issues.
Verify Power Outage: Confirm availability and evaluate your air fryer’s electricity flow.
Obstruction Removal: Maintain an unobstructed touch screen by avoiding interference.
Address Moisture Exposure: If exposed to moisture, thoroughly dry the air fryer before use.
Gentle Edges Tapping: Gently tap the touch screen edges to reposition if any displacement occurs.
Optimize Door Support: Ensure the air fryer door is aligned for optimal touchscreen operation.
Professional Assistance: Seek expert advice if the remedies mentioned above prove ineffective.
Handling an Air Fryer Without Electricity
When your air fryer’s touch screen fails to function, there could be a brief explanation. It might not be turned on, or the issue could stem from an unstable power supply, a broken wire, or improperly functioning touch keys.
Check the Power Supply
Firstly, ensure the air fryer’s plug is correctly inserted, and the power cord is intact. Confirm whether the supplied voltage is stable or fluctuating.
Inspect Assembly Joints
If your air fryer is unresponsive or not receiving power, meticulously examine the assembly joints during installation. Ensure that all parts have been properly installed. Sometimes, missing or misaligned components can directly impact cooking performance.
Try a 15-Minute Reset
If your air fryer remains inactive for an extended period and fails to illuminate upon being turned on, attempt turning it off for around 15 minutes before restarting it. Ensure the power supply is stable and steady, and properly adjust the timer knob. You can use the air fryer to prepare your desired dishes.
Consider Replacements
If expert assistance doesn’t yield satisfactory results, consider contacting the seller for potential replacement options. The air fryer may be repaired or exchanged as necessary if it is under warranty.
If you possess the required expertise, you could consider the following steps:
Thoroughly inspect and repair the switch if it’s bent.
Replace the memory card if deemed necessary.
If the wires connected to the touch screen are faulty, proceed to remove and replace them.
Ensuring correct grammar and sentence structure is essential to convey information accurately and clear
Conclusion
Thus, you can know the common problems of the air fryer and how to use it properly to minimize unfortunate issues. Please share this valuable information to help everyone be equipped with more knowledge when using this product.
Derry Clarke is an Irish celebrity chef and restaurant owner L’Ecrivain. He has also served as a reality TV judge, having acted as a judge alongside Bibi Baskin and Sammy Leslie on the RTÉ reality television series One Fáilte Towers, and has appeared on other shows such as Restaurants.
How to use an air fryer? How to clean the oil-free fryer? It must be a question that many homemakers are interested in because oil-free fryers are increasingly appearing in family kitchens. To know more about how to use an air fryer for dummies and maintain a healthy fryer and more helpful information about the oil-free fryer, let’s read the article below with Big Sun Cook!
How to Turn on an Oli Less Fryer
If you want to know how to use a healthy fryer, first know how to turn on the oil-less fryer! To turn on the oil-less fryer, you can follow these steps:
Step 1: Ensure the machine is correctly plugged into the power outlet.
Step 2: Press the power button to turn on the product. Some models may require pressing and holding the button for a few seconds.
Note: Find the power button on the machine. Usually, this button is located on the control panel or near the digital display.
Step 3: Once the oil-free fryer has been turned on, you must set the desired temperature and cooking time. Most oil-free fryers have knobs or dials for adjusting these settings.
Step 4: Some oil-less fryers require preheating before you can start cooking. If your machine requires a preheater, preheat oil-free fryer for a few minutes according to the manufacturer’s instructions.
Step 5: Once the product reaches the desired temperature, you can place the food in the cooking basket or tray. Close the lid and set the cooking time using the controls.
Step 6: During the cooking process, you can monitor the progress through the transparent window or by opening the lid of the oil-free fryer. Be careful when opening the top, as hot air or steam may escape.
Step 7: When the food is cooked, and you are done using it, press the power button again to turn off the machine. Unplug the oil-less fryer from the electrical outlet.
How to Use an Air Fryer? Using air fryer for the first time
An oil-free fryer is a device that does not use oil to cook food, using only the heat of the air circulating in the pot. In addition, frying food with an oil-free fryer helps to limit grease, make food even more delicious and provide a safe and nutritious meal for the whole family.
How do oil-free fryers work?
The oil-free fryer operates on the principle of vacuum frying with a heating mechanism. The heat source from electricity, combined with the convection cooling fan, circulates quickly throughout the surface of the food to help the food cook in a uniform hot air environment. Featured is the Rapid Air technology that makes the air circulate quickly and powerfully. At the same time, the heating element emits infrared radiation that deeply penetrates beneath the food’s surface, resulting in an exceptionally rapid heat transfer. This process contributes to the food’s crispy texture.
The symbols on the oil-less fryers need to know
On/off button
The power button icon will be visible after plugging in and disappear after unlocking the control panel.
The power button allows you to power on the console. In addition, this button also allows you to pause cooking to prepare more food inside the oil-free fryer, helping to cook all foods evenly.
Temperature up/down button
Thanks to this button, you can easily adjust the appropriate temperature to prevent food from burning due to overheating.
Time selection button
In general, most models of the time and temperature control buttons have the same configuration. Therefore, each cluster of buttons will be placed to the sides so that users can easily distinguish which side to adjust the temperature and which to adjust the time. However, some models use a mechanical knob (without an LCD screen), so a rotary knob will replace the -/+ button.
When adjusting the temperature, each time you press the button, the time will increase or decrease by 1 minute until you reach the time you see fit.
How to install a newly purchased oil-free fryer
The first time you use an oil-less fryer, you need the following:
Step 1: Lift the product out of the carton.
Step 2: Remove the plastic bag and paper on the pot body.
Step 3: Wash the frying tray and rack with dishwashing liquid before use and cover the frying rack and pan to dry.
Step 4: Next, you take a soft damp cloth to wipe clean through the outer pot body.
Preparing to use the oil-free fryer
Step 1: Place the hot air oven on a flat surface. Note that it should be placed on heat-resistant materials such as kitchen countertops.
Step 2: Install the frying rack and tray in the pot’s correct positions.
Step 3: Unplug the power cord from the power cord compartment at the bottom of the pot.
How to use an air fryer for the first time?
Properly using an oil-free fryer makes the product more durable and safe. It helps the food to be processed more deliciously. Detailed steps are as follows:
Step 1: Plug the pot’s plug into the household’s leading power.
Step 2: Lift the frying pan gently out of the pot.
Step 3: Put the food to be fried into the frying tray.
Note:Do not put the amount of food in the fryer beyond the MAX line. If you add more than the specified line, the finished product will no longer be delicious.
Step 4: Put the frying rack back into the pot cavity.
Note: While the pot is cooking or has just finished cooking, absolutely do not touch the pot’s body. It will easily cause burns, but hold the handle and lift the frying rack.
How to Use an Air Fryer for Chicken
Step 1:Prepare chicken and spices
Choose pre-prepared chicken and clean the feathers and internal organs. You can choose wings or thighs if you like because baking the whole baby takes a long time.
After cleaning the chicken, rub a little salt on it and then wash it to reduce the fishy smell.
Step 2:Marinate chicken for flavor
With this method of frying chicken in an oil-free fryer, we should marinate for about 30 minutes – 1 hour to ensure that the chicken absorbs the spices.
Use a sharp knife to cut into the chicken body so the spices can penetrate evenly when marinating. The finished chicken will be more decadent and more delicious.
Step 3:Fry the chicken in an oil-free fryer
Once the marinating is done, let’s fry it together.
Heat the oilless fryer; when the pot has stabilized, put the chicken in the product. Everyone should line the foil underneath.
Adjust the temperature to 200 degrees Celsius for about 25 minutes for the chicken to cook. Then turn the chicken over and spread some honey on the body. Set the temperature to 180 degrees for 15 minutes.
When the chicken is cooked, the finished product will have a beautiful golden color and absorb the characteristic sweetness of honey. The soft and fragrant meat is delicious when served with salad or bread.
Note: You can dip it with green pepper salt or chili sauce for extra flavor.
How to Use an Air Fryer for Chips
After preparing the clean potatoes, follow the steps below to get the desired fries.
Step 1: With potatoes, you need to clean the sandy soil, peel it off with a knife, and cut it into bite-sized pieces.
Step 2: Use a bit of clean salt to dilute with water. Then let the potatoes soak in dilute salt water for about 15 minutes and then take them out. And wait for the water to drain.
Step 3: Add cooking oil to mix well after the potatoes are drained.
Step 4: Heat the oil-free fryer at 180 degrees Celsius for about 5 minutes.
Step 5: After the pot is heated, put the potatoes in the pot. And fry for about 15 to 20 minutes. You should remove the tray to stir the potatoes until golden brown during frying.
After the potatoes are cooked, turn off the pot, put the food on a plate and enjoy. You can use ketchup or chili sauce to serve it will be great.
Final Words
After reading the above article, surely everyone will no longer wonder how to use an air fryer. In addition, the above article has been provided by us – Big Sun Cook, with the necessary information for those new to using an oil less fryer for the first time. Hope the information is helpful to you. Thank you for reading this article!
Derry Clarke is an Irish celebrity chef and restaurant owner L’Ecrivain. He has also served as a reality TV judge, having acted as a judge alongside Bibi Baskin and Sammy Leslie on the RTÉ reality television series One Fáilte Towers, and has appeared on other shows such as Restaurants.
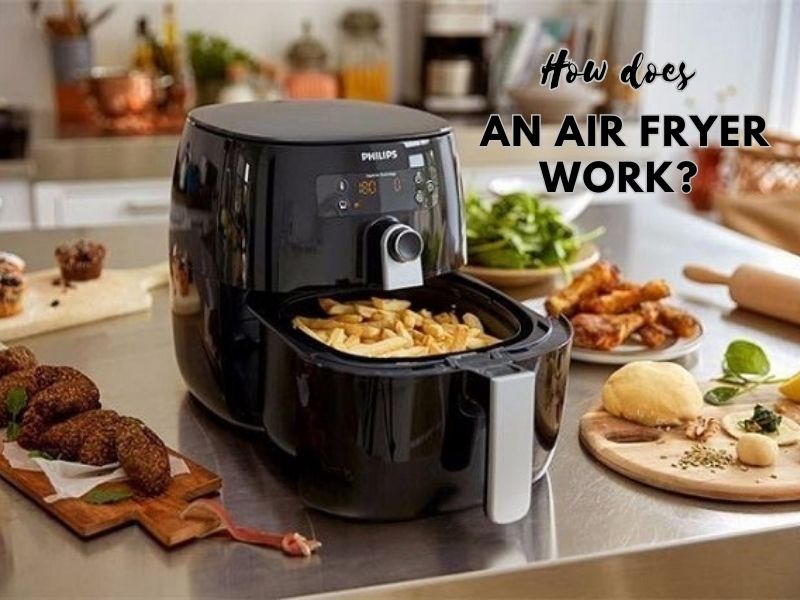
Oil-free fryers have become a global trend thanks to their ability to cook the fried foods we love with less fat. But can they fry our food wonderfully? And how does an air fryer work to create such unique meals?
Below, we will explain how does an air fryer work and why it can reduce excess fat and bring delicious meals. Furthermore, we’ll also explore other foods you can make using an oil-free fryer, not just limited to low-fat fries.
Describe an air fryer
In the bustling market of the modern kitchen industry, the oil-free fryer has quickly gained attention and become a “new wind” for cooking lovers. The oil-free fryer has revolutionized food processing with advanced technology and incredible convenience. However, with the explosion of oil-free fryers on the market, many people still wonder: “What is an air fryer that can solve their worries?”
The simple answer is that an air fryer is a kitchen appliance that utilizes convection air currents to cook food, serving as a healthier alternative to traditional frying methods while overcoming drawbacks. The structure of a basic oil-free fryer consists of a shell, an upper body, and a lower body.
Structure of the shell: This is the outer covering, which insulates and insulates to keep the user safe during the pot operation. On the case, there are buttons to adjust the temperatureand time.
Time knob: Mechanical knobs or control keys with attached screens adjust food cooking time. The maximum cooking time is about 60 minutes.
Temperature knob: Can be mechanical knobs or control keys with an attached screen to adjust the cooking temperature. The normal maximum temperature is 200 degrees Celsius.
Structure of the upper body: Including heat bar and fan.
Heat rod (Mayso wire): this is the main part that generates heat to heat the air inside the pot. The heating temperature of an oil-free fryer may vary slightly depending on the model, typically around 200 degrees Celsius.
Fan: Has the function of helping the air flow heated by the Mayso wire to circulate throughout the inside of the pot, helping the hot air to circulate quickly in the direction of cooking the food inside.
Structure of the lower body: Consists of 2 parts: tray and frying basket.
Frying tray: Used to store food. The frying tray can be easily inserted or removed from the case thanks to a plastic handle that attaches directly to the tray.
Frying basket: Placed inside the tray, made from metal and usually coated with one or more non-stick layers to prevent food from sticking to the pot. The bottom of the frying pan is usually made of a ridge shaped like a pinwheel to help distribute heat more evenly.
With different types of oil-free fryers, the corresponding frying tray and the frying pan will also have different sizes. The most common size of fried fish is about 2 liters, equivalent to holding nearly 1kg of food (actual weight may vary depending on the type of food).
How does an air fryer work?
Oil-free fryers use heat instead of traditional grease to fry food. The heating element generates heat, which is transferred in two directions. The first direction of radiation goes directly to the top of the food, and the other direction is pushed along the sides by the fan to the bottom of the pot and then reflected and cooked to the bottom.
This is the Rapid Air technology, which is the key to the success of the oil-free fryer. Nearly all fryers today use this technology to cook food. With Rapid Air technology, the heat is evenly focused on both sides of the food, so the food is cooked evenly without the cook having to turn around like the traditional cooking method (the traditional way of frying, the heat is focused on the underside more).
In traditional frying, cooking oil is a heat transfer solvent, whereas Rapid Air technology uses air. The characteristic of air is that it transmits heat less than cooking oil, so in an oil-free fryer, for food to be cooked and golden evenly like oil, the air needs to circulate very quickly and strongly to be able to carry a large amount of heat through the air through a thick mass of food.
At the same time, the heating element also generates infrared radiation that penetrates deep below the surface of the food, and this combination produces a very high heat transfer rate. As a result, the food is cooked to a golden, crispy color, without or using only a tiny amount of fat, so the food is better for the user’s health.
How does an air fryer work compared to an oven?
The same point
Oven and oil-free fryers have one thing in common they both heat and cook food with heat. Oven use microwaves, while oil-free fryers use convection hot air to cook food.
Both of these devices are geared towards modern life – serving the family’s daily meals and minimizing effort and time in preparation and cleaning.
Differences
So the oil-free fryer is different from the oven?
The oil-free fryer was invented to serve the primary function of frying and baking to be optimal for these two features. However, microwave ovens are limited in heat dissipation, so it is difficult to use for frying or baking purposes like a microwave oven.
Currently, on the market, there is a microwave with a grill advertised as being able to take care of the baking feature already on an oven or oil-free fryers. However, according to Select Standard, this device only has the above heat bar, so it can still only do some simple dishes such as toasting sandwiches, popping popcorn, etc. Still, it is difficult to roast a whole chicken like an oil-free fryer.
The microwave was born to reheat and defrost food, so it is optimized in design and function to serve these two purposes. Thus, it is also impossible if you use any other device, such as an oil-free fryer or oven, to replace the microwave.
Advantages and disadvantages of air fryer
Oil-free fryers have many advantages but could be better devices. Oil-free fryers also have disadvantages and notes when buying and using to take full advantage of the cooker’s benefits. In the article, we look at the advantages and disadvantages of an oil-free fryer:
Advantages
Disadvantages
Good for health, reduce calories and excess fat.
Expensive, especially for advanced technology models.
Safe, easy to use, and features temperature control.
Limited capacity, can only cook small amounts of food at a time.
Preservation of nutritional value in food.
Time and temperature should be controlled to avoid burning or overheating the food.
Produces food with good color and taste.
Requires enough storage space to place the oil-free fryers.
Energy saving compared to traditional ovens.
Cleaning and sanitizing can be difficult and time-consuming.
Suitable for a small family.
Grease cannot be reused, causing waste and impact on the environment.
Does not cause unpleasant odors in the kitchen.
Limited versatility compared to other cooking appliances.
Multi-function can bake, reheat and fry.
Care should be taken to avoid burning, uneven cooking, or overheating.
The oil-free fryer is safe and durable.
How to choose an air fryer?
An oil-free fryer is a household electrical appliance that cooks food without using oil, which is very suitable for those afraid to gain weight. Remember the ways to choose the oil-free fryer below to choose the best multi-function fryer.
Material: Choose a pot with a PP, ABS, or other heat- and force-resistant shell. The inner pot should be stainless steel with a non-stick coating for cleaning and easy cooking.
Power: High power cooks food faster but also consumes a lot of electricity. You can choose a pot with a high capacity to save time. Standard control is usually from 1500W – 2000W.
Style and design:
Choose a pot style that suits your taste and check parts like the lid.
Handle.
Control panel for quality and usability.
Capacity: Select the pot capacity based on the number of family members and cooking needs. The 2-3L accommodation is suitable for a family of 3-4 people, while the 4-6L capacity is suitable for large families.
The ability to absorb odors and reduce smoke: Choose a pot that absorbs and reduces smoke to keep the flavor of food and avoid the smell of cooking oil on the wall.
Brand and origin: Choose pots from reputable brands with transparent sources to ensure quality and after-sales service.
Warranty: Check the pot’s warranty period to ensure stability and durability.
Bundled conveniences: Consider add-ons such as a timer, temperature control, automatic shut-off, and Rapid Air technology that shortens cooking time and reduces smoke odors.
Cost: Set a budget that fits the price of an oil-free fryer; fees typically range from $120-$250, depending on the brand and features.
Walking around the big e-commerce sites: Amazon, eBay. I noticed that oil-free fryers in the price range of 130-200 USD are the most purchased by users because these prices are affordable for American homemakers and consumers in the European market.
What can you cook in an oil-free fryer?
While dedicated oil-free fryers can be used to reheat leftovers and toast, these work best for making potatoes or anything frozen and fried. It also includes chicken dishes, which can be incredibly healthy in a deep fryer if you don’t use too much oil.
You can also fry eggs in a deep fryer. We explain how to do it:
Preheat your deep fryer to 163ºC.
Crack an egg (or two) into a lightly oiled fryer tray.
Slide the tray into the deep fryer for about seven minutes.
What foods should you avoid?
Experts warn against deep fryers to prepare doughy foods, as they won’t cook homemade pancakes or pastries like an oven. Similarly, rice and pasta should not be cooked in an oil-free fryer as these need to be cooked first for the oven to have a delicious texture.
Do oil-free fryers make tasty food?
In addition to faster cooking times, oil-free fryers can add an interesting texture to your meals, as they can crisp up chicken and kale in no time. And since these devices don’t require butter and oil, you can also create more heart-healthy recipes.
We’ll love the oil-free fryers if we cook many frozen and breaded foods, such as fried onions and chicken fillets. The oil-free fryer crisps your food, giving you a crispy, golden exterior instead of soggy.
Final Thoughts
Both help women reduce the burden when cooking, saving time and being convenient and safe for health. This product line is increasingly trusted, becoming a practical assistant in cooking work grills. Our above article – Big Sun Cook, has provided everyone with the most complete and accurate information to answer the question How does an air fryer work?I hope the above article will help you choose an oil-free fryer for your family’s kitchen! What are you waiting for? Buy a genuine, reasonably priced oil-free fryer for your family kitchen. Delicious, attractive meals, bring rice and safe for health!
Derry Clarke is an Irish celebrity chef and restaurant owner L’Ecrivain. He has also served as a reality TV judge, having acted as a judge alongside Bibi Baskin and Sammy Leslie on the RTÉ reality television series One Fáilte Towers, and has appeared on other shows such as Restaurants.