Do Air Fryers Cook Faster – Air fryer or Oven?

Do-air-fryers-cook-faster-than-oven

In culinary choices, the battle between air fryers and ovens often centres on the pivotal aspect of cooking times. However, this decision encompasses more than just time, especially with the convenient presence of an air fryer on our countertops. In our fast-paced modern lives, where time is a perpetually scarce luxury, the importance of efficient cooking cannot be overstated. This leads to a fascinating question: Do air fryers cook faster?

I’ve considered cooking as a laborious and time-consuming task, a sentiment that shifted significantly upon my recent acquisition of an air fryer. This compact culinary marvel has become an important part of my kitchen arsenal, working alongside my dependable convection oven. Notably, many dishes that once exclusively occupied oven space have now found their counterparts in the air fryer, making meal preparation more flexible and time-saving.

The timeless debate resurfaces: Does the air fryer or the oven wield culinary superiority and efficiency? In an era that values convenience and speed, marketing often emphasizes these attributes. Embracing an automated lifestyle brings comfort and liberates valuable time for other endeavours. For these reasons, among others, my air fryer has taken its place as a vital tool in my cooking repertoire.

While the air fryer’s capabilities are confined to specific domains, particularly in tasks such as ingredient selection, seasoning application, precise slicing, and artful plating, it unquestionably alleviates a significant portion of the cooking burden beyond these creative aspects. This starkly contrasts the oven, which demands vigilant time and temperature management, thereby making cooking a more time-intensive pursuit.

The hallmark of the air fryer is its swift cooking. Its ability to rapidly attain high temperatures (some even reaching 350°F+ within 3 minutes) is attributed to its smaller size and robust power. In this aspect, a distinction arises when compared to the microwave, renowned for its speed. While the air fryer excels, it does fall short of the microwave’s velocity.

A noteworthy point is that the air fryer doesn’t require preheating to achieve delightfully crisp surfaces, a luxury the microwave cannot provide. Despite its convenience, the microwave cannot impart the coveted fried texture to dishes. These two appliances, stemming from distinct culinary philosophies, have honed their crafts separately and effectively.

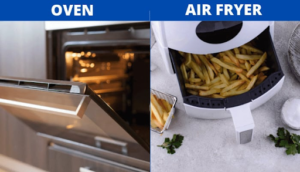
Do Air Fryers Cook Faster Than Ovens?

Equipped with an average volume ranging from 3 to 5 litres, a power capacity of 1300 to 1500W, and a peak temperature of 200°C, the air fryer boasts commendable performance on par with ovens. However, due to its compact nature, confined within a smaller space, the air fryer achieves swifter cooking speeds than conventional ovens.

Is Using an Air Fryer More Economical Than an Oven?

The economic aspect of utilizing an air fryer versus an oven is contingent upon several variables, including regional electricity rates and the size and model of the appliances. Generally, air fryers exhibit higher energy efficiency than ovens, consuming less electricity and producing less heat. However, this only sometimes translates to overall cost-effectiveness, as factors such as the initial appliance cost and ongoing maintenance expenses should also be factored in. Before making a decision, conducting a comprehensive analysis of both options’ costs and benefits is advisable.

Why Do air fryers Exhibit Faster Cooking Times Compared To Ovens?

Both air fryers and ovens excel at quicker cooking than traditional stoves due to their utilization of hot air circulation through fans. However, the distinction in cooking speeds stems from several factors, elaborated upon below:

Compact Capacity

Physical attributes significantly influence the cooking process. With its smaller capacity, an air fryer possesses heightened heat absorption capabilities, resulting in expedited cooking times.
Despite an oven having dual heating elements versus an air fryer’s singular piece, the differential sizes contribute to distinct cooking speeds.

Heat emanates from the top of the air fryer, directly engaging the food with fan assistance. The shorter distance between the heating element and the food in the air fryer accelerates the cooking process.

In contrast, a larger oven requires the heating elements to attain optimal temperature and uniformly distribute heat throughout its interior. This leads to longer cooking times compared to an air fryer.

Reduced Preheating Interval

Ovens require preheating time for diverse dishes during cooking—a phase referred to as preheating. The air fryer’s preheat interval is two to three minutes. Given the appliance’s rapid and efficient cooking tool, most air fryer recipes omit preheating.

The air fryer’s convection tool expedites cooking by instantly channelling hot air onto the food. This not only hastens the cooking process but also shortens waiting times.

However, the air fryer requires only a brief two-minute preheating period in scenarios necessitating preheating. Conversely, conventional ovens may require 10-15 minutes to attain the desired preheating temperature.

Minimal or No Oil (or Marination) Requirement

Due to its intense heat and air circulation, the air fryer achieves swift cooking without requiring extensive pre-marination or excessive oil usage. Specific recipes even forgo oiling or pre-marinating.

Influential Fan Speed and Size

The air fryer incorporates a high-speed fan that proficiently distributes heat, thereby shortening cooking times. The fan’s speed is approximately 30-35% greater than that of a basic convection oven. The accelerated fan speed also expedites the process of heating the cooking space.

Rapid Cooking Pace

Convection ovens feature smaller fan sizes and lower-speed fans compared to air fryers. The air fryer attains higher temperatures and cooks faster, reaching such temperatures within three minutes, whereas ovens require around 15 minutes to achieve equivalent temperatures.

How much faster does an air fryer cook than an oven?

An air fryer commonly cooks food faster than an oven due to its smaller size, efficient heating mechanism, and focused hot air circulation. Cooking times in an air fryer can be 25-30% faster than traditional oven cooking. However, the exact difference in cooking speed may be founded on factors such as the specific air fryer and oven models, the type of food being cooked, and the recipe used.

Do Air Fryers Cook Faster Than Deep Fryers?

We understand the rapid heating tool of air fryers let’s examine the pace of deep fryers.

In deep frying, using a deep fryer consumes more time than an air fryer, given that the latter only necessitates heating the air. Contrarily, with deep fryers, a significant portion of the delay originates from the substantial volume of liquid needing to reach boiling point before food can be fried.

The culinary change occurs within minutes once the oil attains its boiling point. It’s worth noting that while the air fryer doesn’t replicate the exact crispiness of deep-fried cuisine, it operates sans the use of oil.

Is Preheating Necessary for an Air Fryer?

Experts confirm that preheating an air fryer yields enhanced processing efficiency and crispness. However, it’s crucial to note that the necessity for preheating varies depending on the air fryer model. Some air fryers mandate preheating before cooking, while others do not.

The emergence of oil-less fryers as a popular household appliance underscores its role in facilitating cooking. Such fryers enable users to minimize grease usage, employing only minimal oil to prepare dishes.

Preheating the fryer pot effectively promotes hot air circulation throughout its interior. Consequently, cooking commences when food is placed inside the air fryer. This step also rapidly vaporizes surface moisture, endowing food with a selected golden hue and the intended crispness upon cooking.

Final thoughts

In the ongoing debate of “Do Air Fryers Cook Faster,” air fryers emerge as the clear winners over ovens regarding cooking speed. This is attributed to their compact design, strategic top heating element placement, and the efficient operation of their rapid fan. Notably, the preheating duration of merely two minutes and the air fryer’s swift temperature increase translate to considerably expedited meal preparation compared to traditional ovens.

While ovens shine in tasks like bulk cooking and offering versatile cooking modes, it’s essential to recognize that both appliances boast unique advantages. By exploring the benefits above and the diverse food preparations, you can make an informed decision that suits your culinary preferences. For those with the space and means, owning both appliances could enrich your culinary journey, granting you a more comprehensive array of options and delectable meals. Best of luck in your culinary endeavours!

How to clean instant pot air fryer lid – All things that you should know!

The popularity of instant pot air fryers stems from their remarkable capacity to uphold both cooking time and quality. This attribute not only economizes time but also reduces ingredient consumption.

However, extended usage can result in the accumulation of stubborn grease on the lid, which may lead to severe damage to the appliance. We have compiled comprehensive guidelines on effectively cleaning an instant pot air fryer lid to assist with this common concern. Delve deeper to uncover the solution and methods for “How to clean instant pot air fryer lid”.

How can you wash your Instant Pot air fryer lid?

The method for washing the instant pot air fryer lid hinges on its usage and cleaning frequency.

A specific procedure should be followed if the lid undergoes daily use and cleaning. However, an alternate method is required if the top is utilized and cleaned infrequently. The following are comprehensive step-by-step instructions for both scenarios.

Regular Cleaning Routine

For those who maintain a regular cleaning regimen for their instant pot air fryer lid, the method is straightforward and doesn’t demand significant time investment.

Step 1: Clean the Cooking Pot

Clean the cooking pot before attending to the instant pot air fryer lid. It prevents leftover food or residue from transferring onto the top during cleaning. Placing the cooking pot in a dishwasher ensures its cleanliness without hassle.

Step 2: Clean the Silicon Ring

After cooking, a residue may accumulate around the silicon portion of the lid. Before using the top again, thoroughly wash this ring. Gently detach the silicon part and clean it using liquid soap and a soft sponge or brush.

Step 3: Clean the Lid

As this lid is cleaned daily, there’s no need to disassemble its components. It can be placed in a dishwasher for cleaning. Alternatively, it can also be cleansed using liquid soap and a sponge.

Step 4: Dry and Polish

Invert the lid and cooking pot to drain any excess water. Employ a microfiber cloth to meticulously wipe the jar and lid, ensuring no moisture remains to prevent rust or harmful substance accumulation.

Step 5: Thorough Cleaning (Monthly or Every 2 Months)

For consistent Instant Pot users, a comprehensive cleaning is recommended every month. If usage is less frequent, you can opt for cleaning every two months. Before starting the cleaning process, ensure the appliance is unplugged and its cord is stored safely to prevent any contact with moisture.

To maintain the cleanliness of your Instant Pot, wipe the lid or the area it is in contact with inside the pot using a damp cloth or paper towel. This practice prevents the accumulation of dirt or food remnants on the surface.

Furthermore, pay attention to cleaning smaller components such as the “quick release” handle, the metal shield encompassing the steam valve, and the condenser cup. These elements can trap food particles and residue, necessitating their removal and thorough washing with warm soapy water.

To conclude the cleaning regimen, rejuvenate your pot’s aroma by adding 1 cup of vinegar, 1 cup of water, and the zest of a single lemon to the inner pot. Securely fasten the lid and set the Instant Pot to steam for 2 minutes. After completion, your pot will emerge both immaculate and fragrant.

Occasional Deep Cleaning

If your schedule doesn’t allow for regular cleaning of the instant pot air fryer lid, it can lead to a significant buildup of grease and stains. In such cases, two techniques can be employed. Both methods are detailed below.

Method 1: Vinegar and Liquid Soap Method for Cleaning Instant Pot Air Fryer Lid

Step 1: Prepare the Cleaning Solution

Begin by gathering a small dish. Combine approximately one cup of white vinegar and two to three spoonfuls of liquid dish soap in the dish.

Step 2: Immerse the Components

Submerge the plate, heating unit, fan, and screws into the mixture of white vinegar and liquid dish soap. Ensure that the variety fully covers all the elements. Adequate coverage is essential to effectively remove grime and residue from the instant pot air fryer lid.

Step 3: Allow Soaking Time

Let the plate, coil, fan, and screws soak in the mixture for 12 to 15 minutes. If removed prematurely, the accumulated grime won’t soften sufficiently for effective removal.

Step 4: Gently Scrub with a Brush or Sponge

Using a brush with soft but dense bristles or a smooth sponge, gently scrub the dirt and grime if a meeting is unavailable. Avoid excessive pressure while cleaning to avoid damaging the plate, coil, and fan.

Step 5: Cleaning and Drying

After using the brush or sponge, ensure they are adequately cleaned or, ideally, use a clean and dry brush or sponge. Employ the brush and clean water to eliminate any soapy residue and remaining dirt from the instant pot air fryer lid.

Once adequately cleaned, invert the components and give them a slight shake to remove excess water. Use a microfiber cloth to dry the lid and its features thoroughly. Inadequate drying could result in the development of rust over time.

Method 2: Liquid Dish Soap and Warm Water Method for Cleaning Instant Pot Air Fryer Lid

Liquid Dish Soap and Warm Water Method

Step 1: Prepare the Cleaning Solution

Mix liquid dish soap with warm water in a bowl, dish, or bucket, ensuring the mixture reaches the rim of the container.

Step 2: Submerge the Components

Immerse the coil, fan, and screws in the warm soapy water solution. Ensure they are completely submerged in the mixture. Complete immersion is crucial for effectively eliminating grease and grime.

Step 3: Allow Components to Soak

Leave the screws, fan, and coil in the mixture for approximately 10 to 12 minutes. Sufficient soaking time ensures that grease and grime are properly softened for efficient cleaning.

Step 4: Clean the Lid of the Body

The plastic body of the lid also requires cleaning. Neglecting this part defeats the purpose of cleaning the coil and fan, as they will quickly become dirty once the top is reassembled. Thus, cleaning the lid body is essential to maintain overall cleanliness.

Step 5: Clean the Lid Surface

Grab a microfiber cloth and, if available, a pair of cleaning gloves. Dip the material into the warm water and soap mixture, then gently rub it over the lid. It removes grease, stains, and grime, leaving the top sparkling clean.

Step 6: Remove Components from the Solution

Retrieve the lid components from the mixture of liquid soap and warm water. The dirt and stains should come off the parts quickly.

Step 7: Gently Scrub the Parts

Use a brush with soft and dense bristles or a soft sponge to gently scrub dirt from the coil, fan, and screws. Ensure you wash gently to avoid scratching the valuable instant pot air fryer.

Step 8: Rinse and Dry

After removing all the grime and stains, rinse the coil, screws, and fan with fresh water. Then, place these parts in white vinegar using a cleaning container. Allow the lid parts to soak in the vinegar for approximately 8 to 10 minutes. Subsequently, use a microfiber cloth to eliminate any residual moisture.

Step 9: Reassemble the Components

Reattach all the previously removed components to the lid using an appropriate screwdriver for your instant pot air fryer model. Now that you know how to effectively clean the instant pot air fryer lid avoid allowing it to go uncleaned for extended periods, as neglecting this maintenance can result in consequences. Make it a practice to clean the top regularly to provide optimal performance and longevity for your cooking machine. Remember, a little cleaning effort can yield substantial benefits in the long run.

FAQS

Is Baking Soda Suitable for Cleaning?

Using baking soda to clean the lid of your air fryer is not advisable. While baking soda is effective for cleaning, its abrasive nature can harm the lid’s delicate surfaces, such as heaters and fans. It might also strip away protective coatings. Instead, opt for mild liquid soap and lemon liquid to clean. Avoid using salt for scrubbing, as its rough texture can cause damage.

Can You Clean Your Instant Pot Air Fryer Lid in a Dishwasher?

Remember that the air fryer lid is relatively heavy, weighing around 11 pounds, and should not be placed in a dishwasher. Attempting to do so can damage both the top and the dishwasher. Dishwashers employ high temperatures that can cause the paint on the lid to melt and harm the heating elements and fans within the appliance.
Always refer to the manufacturer’s manual for specific lid cleaning instructions for safe and proper cleaning. Adhering to these guidelines will prevent potential damage and maintain the condition of your air fryer.

How Frequently Should You Clean the Instant Pot Air Fryer Lid?

Maintaining the cleanliness and condition of your Instant Pot lid is vital for safety and durability. Cleaning frequency depends on your usage patterns. Consider your usage frequency to determine the appropriate cleaning schedule.
For instance, if you use the Instant Pot weekly, cleaning the lid every two weeks is recommended to ensure its cleanliness and safe usage. Prioritizing hygiene is essential for your safety and your family’s well-being. By adhering to regular cleaning routines, you can safeguard against harmful microorganisms and prolong the life of your Instant Pot.

In Conclusion

Proper cleaning and maintenance are crucial for efficient and safe air fryer usage. However, many users need to pay more attention to these aspects, leading to operational and health-related issues.
The air fryer lid is a critical component that facilitates efficient food processing. Yet, it can accumulate oil, stains, and debris over time. Neglecting regular cleaning can turn the lid into a breeding ground for harmful substances that jeopardize health.
To ensure your family’s and yourself’s well-being, prioritize regular air fryer cleaning and maintenance. This article provides valuable insights into air fryer lid cleaning. We hope this information enhances your understanding and appreciation for maintaining a hygienic air fryer environment. Thank you for reading.

Can you decarb weeds in an air fryer? Revealing the Possibilities!

In today’s households, the hot air cooker has gained considerable popularity, offering a delightful and healthier method to prepare a range of fried or grilled dishes. It eliminates concerns about oily splatters while ensuring the well-being of your health. Can you decarb weeds in an air fryer? Let’s delve into this inquiry. Furthermore, decarboxylating weed is also a crucial step before its usage. But can you effectively perform decarboxylation using an air fryer? Let’s explore this question while emphasizing the importance of cautious temperature control and mindful usage to prevent waste.

Is Decarbing Weed Possible in an Air Fryer?

You can decarboxylate weed using a hot air cooker, but following the correct steps is essential to ensure effectiveness. Proper temperature control is critical. Start by setting your air fryer to 250 degrees Fahrenheit (120 degrees Celsius). Using excessive heat can damage the decarboxylation process. The recommended duration for decarbing is up to one hour. To enhance the process, consider stirring the weed halfway through and continuing for an additional 30 minutes.

Alternatively, a more straightforward method involves placing the weeds in the air fryer basket and cooking it at 240 degrees Fahrenheit (115 degrees Celsius) for 10 minutes. Subsequently, allow the weed to cool down before incorporating it into recipes that require decarboxylated cannabis.

For the first technique, ensure an even weed distribution in the hot air cooker basket. Cook for approximately 20-30 minutes, intermittently stirring to achieve a uniform browning and crisp texture. Always let the decarbed weed cool before using it.

Using these two distinct approaches, you can effectively decarb weed using an hot air cooker. This offers convenience and opens up possibilities for creating flavorful and health-conscious culinary delights.

Optimal Temperature and Cooking Times for Precise Weed Decarb

Achieving perfect decarboxylation of weed relies heavily on precise temperature and timing. Without these necessary factors, the process can quickly go wrong, resulting in burned or badly decarbed weed.

Crucial Temperature Range: Decarboxylation of weed is best achieved within the temperature range of 220 to 250 degrees Fahrenheit. However, it’s critical to acknowledge that individual cannabinoids and terpenes necessitate distinct temperature parameters.

Temperature and Time Guidelines for Specific Compounds: THCa necessitates decarboxylation temperatures of 220 to 240 degrees Fahrenheit, requiring 30 to 45 minutes. In difference, CBDa demands a lengthier cooking time of up to 90 minutes within the same temperature range.

Decarboxylation Time Variability: The duration required for decarboxylation hinges on factors such as the type of plant material and the quantity being processed. Commonly, longer cooking times at lower temperatures play a pivotal role in maintaining the full spectrum of valuable compounds, maximizing their health benefits.

Do You Need to Grind Weed Before Decarboxylation?

While some formulae recommend grinding weed before the decarboxylation process, it’s not a recommended practice. Grinding weed before decarboxylation can lead to the loss of terpenes within the trichomes. Trichomes are focused at the base of the Kief collection chamber.

It’s enough to break the weed into a relatively fine texture to preserve these compounds to the fullest extent possible. This can be easily achieved using your fingers. Hence, grinding is not required at all.

How to decarb weeds in an air fryer?

Decarboxylating weed with an air fryer offers a more straightforward method than an oven.

Essential Tools and Ingredients:

  • An hot air cooker
  • Aluminum foil
  • Weed plant
  • Oven-safe baking dish
  • Cheesecloth or mesh filter

Step-by-Step Guide:

  • Set Temperature and Time: Set the hot air cooker to 250 degrees Fahrenheit and adjust the cooking time to 60 minutes.
  • Prepare the Plant Material: Unlike grinding, which could lead to terpene loss, gently break down the plant material into small to medium-sized pieces using your fingers.
  • Arrange the Weed: Create a thin layer of the broken-down weed within the oven-safe baking dish.
  • Cover with Foil: Shield the baking dish using aluminum foil, puncturing small holes throughout. This facilitates the release of air during the decarboxylation process.
  • Place in the Air Fryer: Position the weed-filled dish in the basket. Pause the hot air cooker at the 30-minute mark or halfway through. Gently shake the baking dish to evenly distribute the weed, promoting consistent decarboxylation.
  • Check for Color: Take it out of the air fryer once the weed turns a rich golden brown.
  • Cooling Down: Allow the weed to cool at room temperature, which generally takes about thirty minutes.
  • Finalizing the Process: After the cooling period, the decarboxylation process concludes.

Using an hot air cooker simplifies the decarboxylation process with these straightforward steps, streamlining the procedure compared to traditional oven methods.

How can you decarb weeds without smell?

During the decarboxylation process, an unpleasant odor is released, mainly when working with more than a few grams. This smell can become quite substantial.

However, there are several approaches you can take to reduce the odor.

  • Oven Bag Method: One effective way is by using an oven bag. Place the weed inside the bag and then into the air fryer. Oven bags are safe for use with air fryers. Ensure you leave a portion of the bottom surface exposed rather than completely covering it.
  • Mason Jar Technique: Another option is to use a mason jar in the hot air cooker. Ensure that the pots you use are heat-proof. Remember that this method is suitable for smaller batches at a time.

By employing these methods, you can significantly mitigate the pungent odor that typically accompanies the decarboxylation of weed.

Consequences of Over-Decarboxylating Weed

As previously emphasized, time and temperature are critical factors in the decarboxylation process. So, what occurs when weed is decarbed for an extended period? Several outcomes should be anticipated.

  1. Flavor Loss: Primarily, the flavorful characteristics that contribute to the enjoyable taste of the weed will diminish. In fact, excessively decarbed weed might resemble and taste similar to burnt food.
  2. Aroma and Texture Impact: Furthermore, you can expect a negative impact on the aroma and the overall consistency of the weed. These attributes could be compromised when over-decarboxylating.
  3. THC Degradation: A critical component of weed is THC, which contributes to its potency and appeal. Excessive decarboxylation can lead to the significant breakdown and destruction of THC and CBD compounds within the weed, potentially rendering them ineffective or significantly reduced in potency.

It’s essential to strike the right balance during the decarboxylation process to preserve the weed’s desired flavors, aromas, and potency.

What are the advantages of using an air fryer to decard weeds?

Using an air fryer to decarboxylate weed offers several benefits compared to using an oven. There are some of the advantages:

  • Faster Process: Air fryers typically heat up faster than ovens, allowing you to start the decarboxylation process sooner.
  • Even Heating: Hot air cookers use a convection mechanism that evenly circulates hot air around the weed. This can result in more consistent decarboxylation throughout the batch.
  • Precise Temperature Control: Many hot air cookers offer particular temperature settings, allowing you to set the exact temperature required for decarboxylation.
  • Energy Efficiency: Air fryers are generally more energy-efficient than ovens, which can be advantageous for longer decarboxylation times.
  • Less Odor: While there will still be an odor when decarboxylating weed, using an hot air cooker with a closed lid might contain the smell better than an oven, which could be helpful if you’re concerned about odors.
  • Smaller Batch Size: Air fryers are typically smaller than ovens, which can be beneficial if you decarboxylate a small amount of weed.
  • Ease of Use: Hot air cookers often come with presets and timers, making setting the correct cooking time and temperature convenient.
  • Reduced Risk of Burning: An air fryer’s even heating and controlled environment might reduce the risk of accidentally burning the weed during the decarboxylation process.

However, it’s important to note that using a hot air cooker for decarboxylation might require some trial and error to find the optimal settings for your specific batch of weed, as different air fryer models may vary heat distribution and performance.

Is there any disadvantage to using an air fryer to decard weeds?

While using a hot air cooker for decarboxylating weed can offer several advantages, some disadvantages should be considered:

  • Higher Initial Cost: Air fryers can be more expensive than other cooking tools, which might not be cost-effective if you only use them for decarboxylation.
  • Small Size and Capacity: Most have a hot air cooker limited capacity due to their small size, making it challenging to decarboxylate larger quantities of weed at once.
  • Temperature Control Challenges: Some air fryers might have less precise temperature control than ovens, which could impact the accuracy of the decarboxylation process.
  • Limited Applicability: Not all weed strains might be suitable for decarboxylation in an air fryer. Experimentation might be required to determine if your specific weed works well with this method.
  • Skill and Experience: Using a hot air cooker effectively for decarboxylation requires skill and experience to ensure that you achieve the desired results without under-decarboxylating or over-decarboxylating the weed.
  • Cleaning and Maintenance: Cleaning the minor components of an air fryer can be more time-consuming than other decarboxylation methods.
  • Uniformity of Decarboxylation: An air fryer’s small size and air circulation might lead to uneven decarboxylation if not carefully monitored and adjusted.
  • Noise and Odor: Hot air cookers can generate noise and release odors during operation, which could be a concern depending on your living situation.

In conclusion, while air fryers offer convenience, there might be better choices for some. It’s essential to weigh the pros and cons and determine if an air fryer aligns with your needs and preferences for decarboxylating weed.

Exit mobile version