Can air fryers cook rice – Best guide!

Can air fryers cook rice

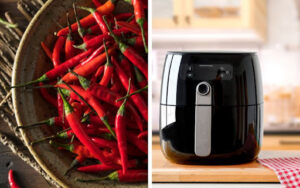
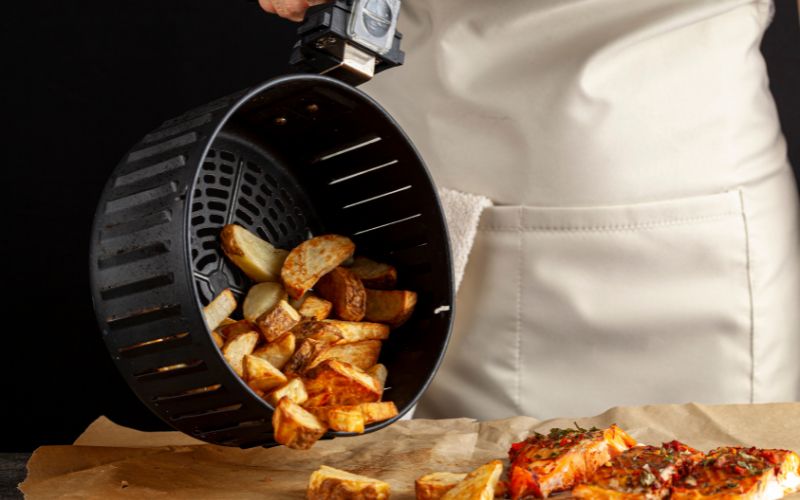
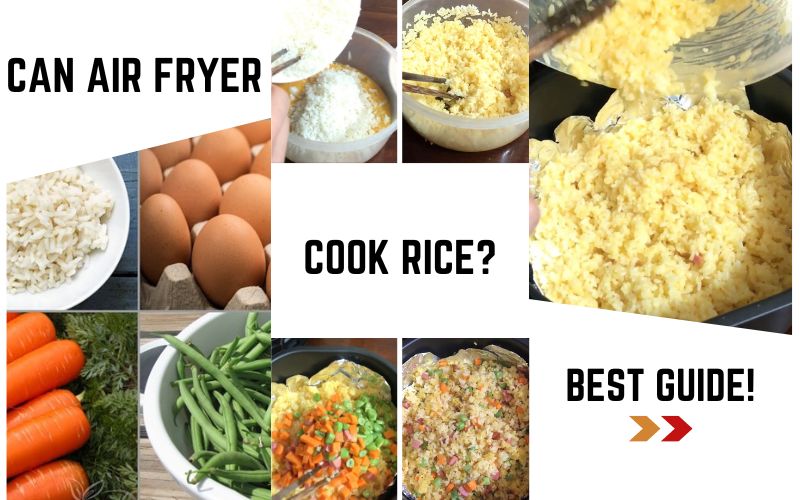
Can air fryers cook rice? The answer is Yes. However, given that air fryers are generally made for frying, roasting, and other food preparation techniques involving hot air circulation, they are not the best option for producing rice. Because an oil-free fryer cannot steam or boil rice efficiently, doing so is rare and advised.

However, there are some cases where using an oil-free fryer to cook rice is appropriate. However, the outcomes might differ from what you were hoping for, so following the right guidelines for your rice and oil-free fryer is important. As a result, we’ll show you how to cook rice in an oil-free fryer for the tastiest results in the following article!

Can air fryers cook rice

How To Cook White Rice In An Air Fryer

Although oil free fryers weren’t made expressly to cook rice, you can occasionally use them. Here is a recipe for producing white rice in an oil-free fryer that has been clarified and made simpler:

The best rice choice is one with short grains, like Jasmine or quick-cooking rice. In the oil-free fryer, this makes it easier and faster to cook the rice.

Rinse the rice: To get rid of contaminants and extra starch, rinse the rice in water until the water is clear. Rice will taste better as a result of doing this.

Utilize an oil-free fryer with rinsed rice and set the temperature to a low 300°F (150°C). Put the oil-free fryer’s lid on.

Water: Add water to the oil-free fryer to help the rice steam correctly. Use the proper water-to-rice ratio for the sort of rice you’re cooking. For white rice, this proportion is typically around 1:1.

Rice preparation: Start the oil-free fryer, then cook the rice for 15 to 20 minutes. Regularly check the rice, and if water is needed, add it. To retain the heat within, avoid opening the oil-free fryer cover too frequently.

Once the rice has finished cooking, test a grain to see if it is finished. Stop using the oil-free fryer and allow the rice to cool slightly before serving if it is soft and delicious.

Please be aware that the outcomes might not be the same as with conventional rice cooking techniques, however, you can experiment with an oil-free fryer if you like.

Tips to Make Rice in the Air Fryer

The following are some useful pointers for cooking rice in an air fryer:

Enhance Your Meal

Elevate your oil-free fryer rice by incorporating your preferred protein sources such as eggs, tofu, or chicken. This way, you can create a complete and satisfying meal in one go.

Stir Frequently

During the 15-minute cooking process, make it a point to stir the rice several times. This ensures that the rice cooks evenly and doesn’t stick together.

Gluten-Free Option

If you’re following a gluten-free diet, be vigilant about the ingredients you use. Check the label of any soy sauce to confirm that it’s gluten-free. An excellent alternative for a soy sauce flavour is coconut aminos, which is naturally gluten-free.

Get Creative with Veggies

Don’t hesitate to experiment with different combinations of frozen vegetables to add flavour and nutrition to your air fryer rice. You can customize it to your taste and dietary preferences.

Air Fryer Fried Rice

Fried rice is a beloved dish known for its deliciousness, allure, and simplicity. Here’s how to make it using an oil-free fryer:

Tools Needed:

  • Air fryer
  • Bowl
  • Spoon
  • Knife
  • Cutting board

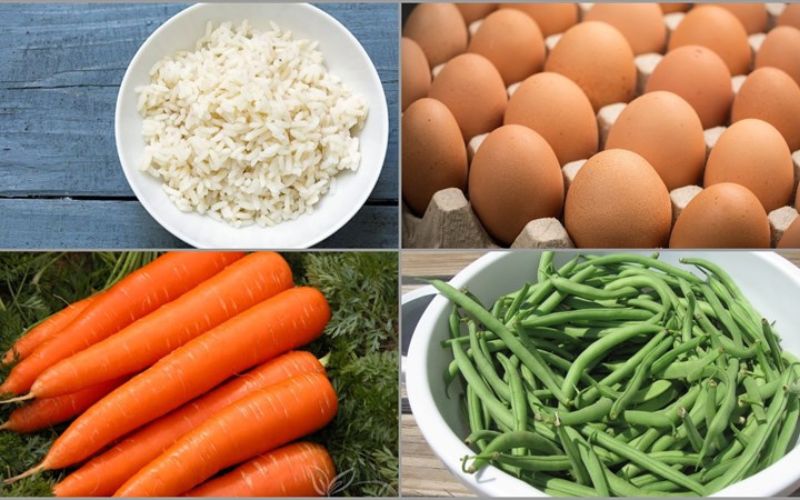
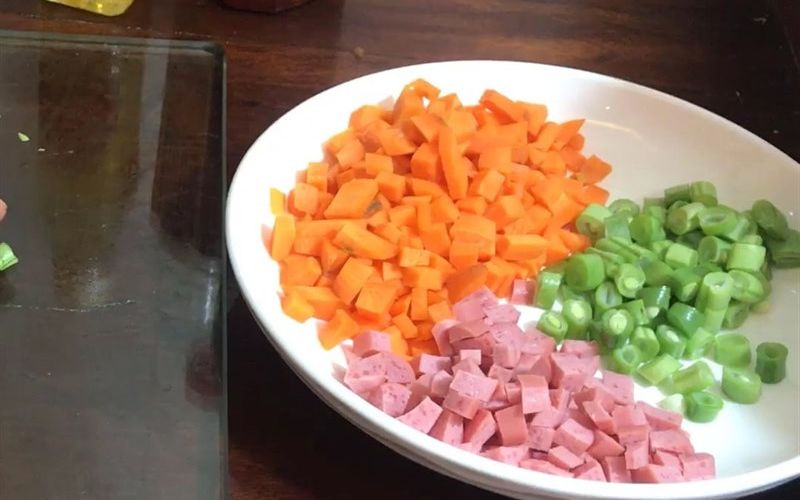
Prepping Ingredients:

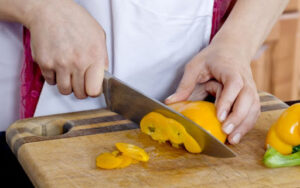
  • Dice the carrots and sausages into small pieces.
  • Rinse the string beans thoroughly, then cut them into small segments.

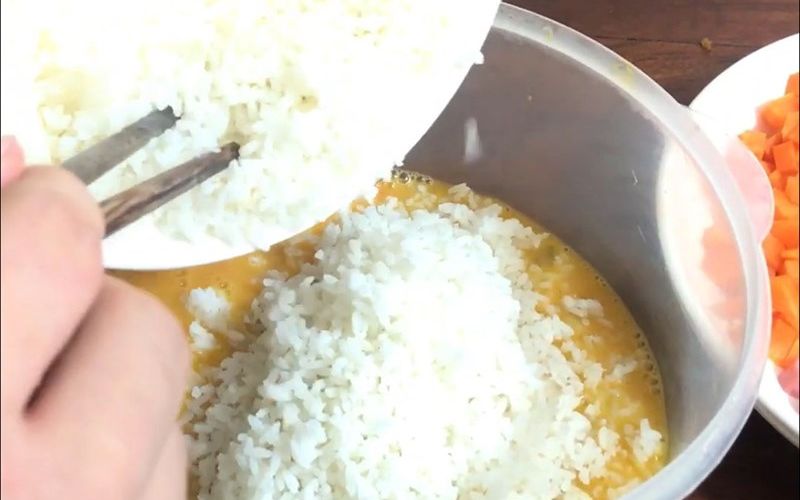
Step 1: Mix the Rice

  • Crack 2 eggs into a bowl, beat them until well-blended, then add the cooled rice and mix thoroughly.
  • Add about 1 tablespoon of cooking oil and mix again. Mixing the rice with eggs helps evenly coat the rice and allows it to absorb the flavours better.

Step 2: Air Fry the Rice

  • Preheat the oil-free fryer to 200°C (392°F) for 5 minutes to stabilize the heat.
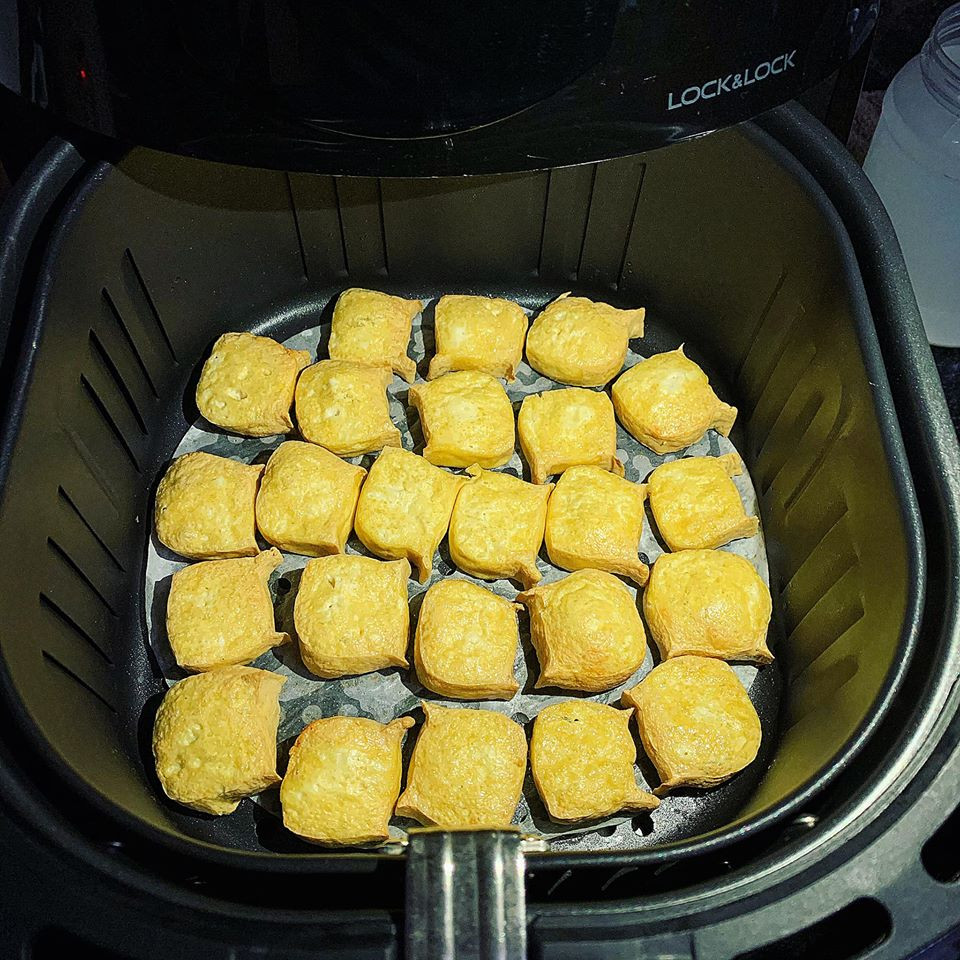
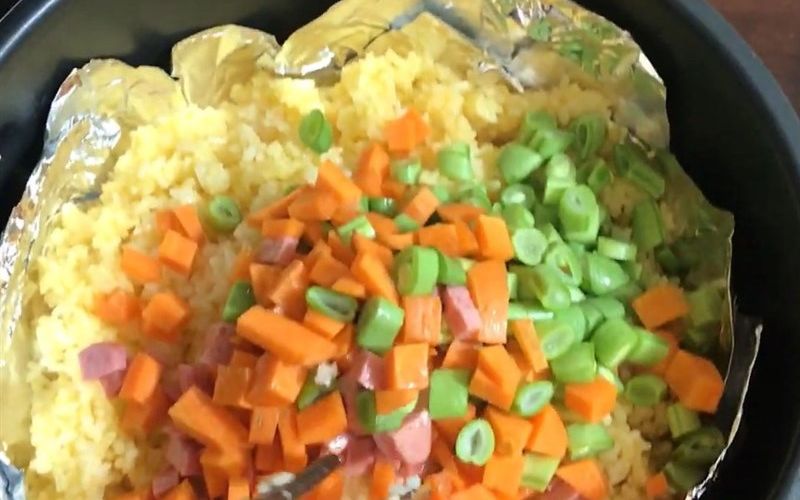
  • Line the oil-free fryers basket with parchment paper. Place the rice mixture into the basket and put it into the oil-free fryer.
  • Air fry the rice at 180°C (356°F) for 5 minutes.
  • After 5 minutes, remove the rice, stir it, and flip it to ensure even cooking.
  • Add the sausages, string beans, and carrots into the oil-free fryer basket, mix them with the rice, and continue air frying at 180°C (356°F) for an additional 5 minutes.
  • Once done, transfer the fried rice to a serving dish.

Step 3: Enjoy Your Fried Rice

  • The finished fried rice should be visually appealing, with moist, non-dried-out rice grains, and a delightful blend of vegetables and sausages. You can enhance the flavour by serving it with a side of soy sauce or hot sauce.

Do I Need to Rinse the Rice Prior to Cooking?

After consulting with my culinary idol, we concluded that washing rice before cooking can be beneficial as it helps remove excess starch and debris that might affect the final texture and flavor of the dish. However, it’s important to note that this step is optional for all types of rice, particularly if the rice is already pre-washed or of high quality. Ultimately, whether or not to wash rice comes down to personal preference and the specific type of rice being used.

If you’re satisfied with your rice dishes’ current texture and flavor, there’s no need to change your routine. However, if you want to enhance your dishes’ taste and texture, giving the rice a thorough wash before cooking may be a worthwhile experiment.

Here are some guidelines for rinsing rice before cooking:

Long-Grain White Rice: It’s a common practice to rinse long-grain white rice to eliminate excess starch, which can result in sticky rice. Rinsing can help achieve separate and fluffy grains. However, it’s not obligatory, and some individuals prefer to skip rinsing to retain more of the rice’s natural starch for a slightly creamier texture.

Short-Grain or Sticky Rice: Rinsing is typically unnecessary for short-grain or sticky rice, as the stickiness is desired for dishes like sushi or specific Asian desserts.

Brown Rice: Rinsing brown rice is less common because the outer bran layer, which contains nutrients, might be washed away. Nevertheless, some people still rinse brown rice to remove dust or impurities.

Specialty Rice: Different types of specialty rice, such as jasmine or basmati, may or may not require rinsing. It’s advisable to consult the packaging or follow the recommended instructions specific to the type of rice you’re using.

Pre-Packaged or Instant Rice: Pre-packaged or instant rice is usually pre-cooked and dried, so rinsing is unnecessary. In such cases, following the preparation instructions on the packaging is best. If you decide to rinse your rice, here’s how to do it:

  • Place the rice in a fine-mesh strainer or sieve.
  • Rinse it under cold running water while gently agitating the rice with your fingers.
  • Continue rinsing until the water runs clear, which may take a minute or two, depending on the type of rice.

Remember that rinsing rice is an optional step, and your choice may depend on the specific recipe you’re preparing and your preference regarding the desired texture and consistency of the rice in your dishes.

CONCLUSION

In conclusion, rice is a versatile and delicious food that can be paired with a wide range of dishes, making it a kitchen essential. Can air fryer cook rice? Once you’ve experienced the simplicity of preparing fluffy, tender, and mouthwatering oil-free fryer rice, you’ll find it indispensable on your dining table.

The preparation process couldn’t be more straightforward—rinse the rice and combine it with water, butter, and salt. Pop it into the oil-free fryer, let it work its culinary magic while you indulge in a good book, and within minutes, you’ll have a perfectly cooked pot of fragrant jasmine rice ready to savor. The “set it and forget it” method is easy and incredibly convenient, making it an ideal choice for busy individuals and families. Whether served as a delightful side dish or seamlessly integrated into your main course, oil-free fryer rice will become a household staple, adding convenience and flavor to your meals.


Do air fryers make food crispy?- All things that you should know!

An air fryer is a revolutionary cooking appliance that has changed the way we think about frying. It operates by circulating hot air, reaching temperatures of up to 200°C, around the food, effectively cooking it without immersing it in grease. The question many ask, “Do air fryers make food crispy?” is answered through the appliance’s design: its internal fan blades ensure the heat is distributed uniformly, mimicking the crispy texture achieved through traditional frying. This method not only reduces the use of excess oil but also delivers that beloved crispy finish with much less fat.

Do air fryers make food crispy

Why can’t my air fryer make the food crispy?

An air fryer, as ubiquitous in kitchens as the rice cooker or refrigerator, might sometimes disappoint with results that are less than crispy. If you’re finding your air-fried dishes lacking that satisfying crunch, it’s not necessarily the appliance at fault. Here are two key missteps to avoid to achieve the perfect crispiness:

Put ingredients that are still wet, not drained completely into the pot

Firstly, introducing damp or wet ingredients into the air fryer is a recipe for soggy outcomes. The retained moisture hinders the cooking process, preventing the exterior from achieving that golden, crispy texture. A simple fix is to thoroughly pat your ingredients dry with kitchen towels or paper before they hit the fryer basket. It’s also wise to forgo air frying for foods coated in a wet batter; traditional deep frying is the way to go to ensure they turn out delectably crispy.

Wrap the foil too thickly or too tightly on the food

Secondly, the way you use aluminum foil in the air fryer can greatly affect the outcome. While wrapping food in foil can aid in a more even seasoning distribution, wrapping it too tightly or using too many layers can insulate the food too much. This creates a barrier between the hot air and the food, resulting in uneven cooking and a lack of crispiness. If you choose to use foil, it’s better to line the basket of the air fryer rather than envelop the food, ensuring the hot air can circulate freely and do its crispy magic.

Mistakes when using an air fryer not make food crispy

Using an oil-free fryer, commonly known as an air fryer, can be a great way to cook healthier meals. However, there are several common mistakes people often make when using these devices. Here’s a rundown of these errors and why they can be problematic:

Not Enough Space

One of the key elements of air frying is the circulation of hot air around the food to achieve even cooking and crispiness. If the basket is overcrowded, this circulation is impeded, leading to unevenly cooked food that is not as crispy as it could be. Always arrange food in a single layer with space between pieces.

Using Too Much Oil

Although it’s called an “oil-free” fryer, a small amount of oil is often necessary to help achieve that desirable crispy texture. However, using too much oil can result in soggy, greasy food rather than the intended crispiness. A light spray or brushing with oil is usually sufficient.

Do Not Wash Off After Each Use

Not cleaning the air fryer after each use can cause old food residue to burn, which can affect the taste and smell of subsequent meals. It can also lead to smoke and potential fire hazards. It’s important to clean the basket and pan after each use.

Do Not Check the Temperature of the Food

Relying solely on cooking time without checking the actual temperature of the food can lead to undercooked or overcooked meals. It’s particularly important to check the temperature of meat and poultry to ensure it is safe to eat. Using a food thermometer can help ensure the proper internal temperature is reached.

No Added Oil

While the appeal of an air fryer is to cook with less oil, adding no oil at all can sometimes result in food that is dry and lacking in flavour. For many foods, a small amount of oil can go a long way in improving texture and taste. It’s also essential for achieving the Maillard reaction, which gives cooked foods a complex flavour and browned exterior.

Foods that easily become crispy in an air fryer

The basic principle of an air fryer is to replicate the crispy texture of deep-fried foods using hot air and minimal oil, and it excels with basic food items like breaded appetizers and seasoned snacks. In its most basic function, it takes frozen chicken nuggets or fries and turns them into crispy, golden delights. The air fryer’s basic appeal lies in its simplicity and efficiency, crisping up basic and more complex foods alike. From basic homemade treats like french fries and chicken wings to more elaborate fare such as mini calzones and buttermilk fried chicken, the air fryer handles them all with basic ease. Even basic vegetables like Brussels sprouts become a crispy, crunchy side dish, and basic sweets like chocolate chip cookies come out with a pleasingly crisp edge. The basic technique of circulating hot air ensures these foods develop a crispy texture that is typically associated with much less healthy frying methods.

How to make food crispy in an air fryer?

For those seeking the secret to crispy delights from an air fryer, the approach is quite straightforward but requires attention to detail. Start by preheating your air fryer if the model calls for it, as this can set the stage for even cooking. It’s also crucial to avoid the temptation to crowd the basket; ample space is key for allowing hot air to circulate around the food, ensuring that each piece cooks evenly and becomes satisfyingly crispy. Crank up the heat, as a hotter cooking environment typically leads to a better crunch.

Don’t forget to give your food a shake or a turn halfway through the cooking time — this little dance ensures all sides have their moment under the hot air spotlight. If you’re dealing with particularly moist ingredients, be sure to pat them dry before they hit the heat, since excess moisture is the enemy of crispiness. A fine mist of oil can be your ally here, lending a helping hand to the browning process, but remember that a little goes a long way.

Choose your foods wisely; not everything is destined for crispiness in the air fryer’s chamber. Items with a natural contrast between a moist interior and a dry exterior, like chicken wings or potato slices, tend to fare best. If breading is your route to crunch, coat with care, ensuring each piece is dredged, dipped, and breaded evenly. And while the air fryer might promise a fried-like finish with less oil, adding too much can dampen your efforts, leaving you with a less-than-crisp outcome.

For larger quantities, patience is a virtue: cook in batches to maintain the airflow that’s so vital to achieving that perfect texture. If you find your food is sticking, consider using perforated parchment paper designed specifically for air fryers to prevent sticking without hindering the flow of hot air. Finally, be prepared to experiment. Each air fryer is a little different, and the quest for the ultimate crisp may require some adjustments to time and temperature settings. With these practices, your air fryer is ready to transform your kitchen into a crispy haven.

Which air fryers make food crispy?

If you’re in the market for an air fryer that can make your food exceptionally crispy, there are several top choices to consider. The Philips Airfryer XXL is renowned for its unique “Starfish” design, which promotes consistent air circulation for impressive cooking results. Ninja’s range of products, like the Ninja Foodi, are not just air fryers but also combine pressure cooking features to achieve greater crispness. Cosori offers air fryers with square baskets, facilitating cooking in a single layer for more uniform crispiness. The Instant Vortex, from the makers of the Instant Pot, is also acclaimed for its ability to cook food evenly. One can’t forget the Cuisinart Air Fryer Toaster Oven, a versatile appliance that combines a toaster oven with an air fryer, allowing for better airflow and crisper food.

For the best results, you should preheat the air fryer if the manufacturer recommends it, avoid overloading the basket, shake or flip the food as directed, and use a little oil on foods that benefit from it for crispiness. Always remember to read the latest consumer reviews and check for the newest models, as manufacturers frequently update their products with new features that can improve cooking performance.

Conclusion

In conclusion, air fryers indeed have the capability to make food crispy. By circulating hot air around the food at high speeds, they mimic the effects of deep-frying without the need for submerging food in oil. This method not only achieves a desirable crispy texture on the outside but also preserves the moisture inside, making for a healthier yet equally tantalizing alternative to traditional frying. Whether it’s golden-brown French fries, crunchy chicken wings, or even crispy vegetables, an air fryer can deliver that coveted crunch with proper usage and technique. So, the answer to “Do air fryers make food crispy?” is a resounding yes, with the added benefit of doing so in a healthier, more convenient way.

Can You Put An Air Fryer On A Wooden Surface? – Things that you need to know!

Welcome to a fascinating article exploring the seamless fusion of an air fryer and a wooden countertop within your kitchen space. Throughout this informative journey, we’ll delve into the air fryer’s health benefits, rapid cooking capabilities, and the protective potential it holds for your cherished wooden surface. However, placing an air fryer on a wooden countertop is not solely about aesthetics; it safeguards the wood’s character from the impact of high temperatures. We’ll share astute methods for confidently utilizing an air fryer without fretting over potential effects on your wooden tabletop. So, the question arises: Can You Put An Air Fryer On A Wooden Surface?

Join us as we embark on this enlightening expedition!🥰

Is it safe to put an air fryer on a wooden surface?

Placing an air fryer on a wooden countertop is not recommended due to the possible heat damage it can cause. While wooden tabletops are typically crafted from high-quality and treated wood, the presence of an air fryer can expedite changes.

The heat emitted from the air fryer can crack the wood and induce warping and surface burns. The deformation of a wooden countertop compromises the visual appeal of the kitchen.

Therefore, if the need surfaces to position an air fryer on a wooden countertop, it is imperative to ensure that the surface is protected enough.
It’s worth noting that prolonged use of an air fryer on wooden countertops can lead to cracks over time. Exercising caution while using the air fryer is essential to maintain the integrity of your wooden surfaces.

Risk of heat damage to wooden surfaces

Heat Exposure

Air fryers use heat as a cooking oil substitute, offering a healthier choice for preparing meals. This innovative approach ensures dishes are cooked without extra grease, yielding outcomes akin to traditional frying methods.

Beyond health benefits, air-fried food retains the same delicious appeal as its oil-fried counterparts. However, it’s crucial to note that the substantial heat generated by air fryers during cooking can pose a risk when placed on surfaces like wooden tables.

Surface Discoloration and Burns

Positioning an air fryer on a wooden tabletop may result in a visible brown stain resembling a burn mark on the surface. This discoloration stems from residual heat retained by the tabletop after using the air fryer. While remedying the warped appearance, taking preventative measures is advisable.

To avert surface burns, consider shielding the wooden tabletop using a heat-resistant cover or placing the air fryer on a metal tray to hinder heat transfer to the countertop.

Potential for Cracks

Extended usage of an air fryer on wooden countertops can lead to surface cracks. It occurs when the heat emitted by the air fryer permeates the wood, inducing damage over time. Intense heat from the appliance could even cause the wood surface to deteriorate.

Detection of cracks signifies that the wooden surface is struggling to endure the heat. To prevent such occurrences, it’s essential to proactively safeguard the countertop before air fryer usage to preserve its integrity.

Risk of Melting

Using an air fryer on plastic or laminate countertops may heighten the possibility of surface melting, particularly with frequent and prolonged appliance usage.

To mitigate the risk, ensure proper precautions when employing the air fryer, especially on surfaces vulnerable to melting, to maintain the longevity of your kitchen’s appeal.

How to protect your wooden surface?

If you’re seeking effective methods to shield your table while utilizing an air fryer, consider the following practical options:

Racks or Supports

Employing frames or supports is straightforward yet effective. Placing these items beneath the air fryer before cooking can provide a buffer against the heat, preserving your table’s surface.

Aluminum Foil

Consider placing a reflective aluminum foil underneath the air fryer to prevent potential damage to your countertop. It acts as a barrier against heat transfer.

Silicone Baking Mat

Utilize a silicone baking mat to shield your countertop from elevated temperatures. Position the rug beneath the air fryer before use for an added layer of protection.

Cutting Board

If you possess a sufficiently large cutting board, it can serve as an adequate safeguard. Place it beneath the air fryer to catch any drips or splatters, concurrently shielding the countertop.

Heat-Resistant Mat

Incorporating a heat-resistant mat under the air fryer during cooking introduces an extra shield between the hot appliance and the table surface, minimizing potential heat-related damage.

Incorporating these protective measures can ensure the longevity of your wooden surface while enjoying the benefits of your air fryer.

What to put under the air fryer to protect the countertop?

Your wooden countertop is not inherently heatproof, so concerns arise about placing an air fryer on it, and the possible effects could be significant.

However, the good news is that several effective solutions are available to shield your countertop from the heat emitted by the air fryer, ensuring its protection.

Let’s explore the options for protecting your countertop:

Heat-Resistant Ceramic Tiles

Using heat-resistant ceramic tiles provides a reliable shield for your countertop against the heat of the air fryer. Choose tiles specifically designed to withstand high temperatures.
Excitingly, these tiles are both cost-effective and easy to find.

Silicone Heat Pads

Utilizing silicone’s well-documented heat-resistant properties, silicone heat pads offer an effective solution to safeguard your countertop from the air fryer’s heat.

What makes silicone pads unique? Firstly, they are made from food-grade silicone, ensuring safety. These pads are also 1.4mm thick, offering substantial protection against heat.

Heat Protector Mats

Like silicone heat pads, heat protector mats provide an alternative safeguarding option. These mats are often favored due to their secure fit on the countertop, minimizing sliding risks.
Moreover, heat protector mats are significantly thicker than silicone pads, delivering comprehensive heat insulation for your countertop. They are particularly suitable for individuals who extensively use their air fryers.

Heat-Resistant

Sealant Heat-resistant sealants reinforce wooden countertops, making them capable of withstanding the heat from air fryers. If your wooden tabletop lacks insulation, placing an air fryer on it can lead to severe consequences. Nevertheless, various solutions exist to protect your countertop from extreme heat.

Where not to put your air fryer in the kitchen?

In addition to knowing where to place your air fryer on a heat-resistant surface, it’s also important to know the places in the kitchen where you shouldn’t put the air fryer. Here are the things you should remember:

Do not place the air fryer in a corner where there is not enough space for heat dissipation at least five inches away from the wall to prevent the wall from being damaged by heat from the air fryer.

Do not place the air fryer on the stove. You could accidentally turn on the stove and cause damage to the air fryer.

Never place the air fryer in the refrigerator while you are using it or if it is still hot from the previous cooking time.

FAQs

Will Use an Air Fryer Harm Your Quartz Countertop? 

Quartz surfaces are known for their durability and non-porous nature, making them generally resistant to the heat emitted by air fryers. However, it’s essential to consider the quality of the quartz material.

Consequently, while high-quality quartz can easily withstand heat, the same may not be accurate for lower-quality variants. The heat generated by the air fryer could cause damage to quartz countertops of inferior quality.

Pro Tip: Remember that quartz has a certain degree of heat resistance. Some premium quartz countertops can handle temperatures up to 400 degrees Fahrenheit.

Nonetheless, using a heat-resistant countertop mat or another protective layer between the air fryer and your quartz countertop is wise. This precautionary measure will effectively safeguard your countertop against heat-related damage from the air fryer.

Can an Air Fryer Harm a Granite Countertop? 

Placing your air fryer on a granite countertop is generally safe due to the sturdiness of granite surfaces. Granite countertops can endure moderate levels of heat.

However, it’s advisable to consider additional protection, such as using a heat-resistant mat or similar materials. By placing a heat-resistant mat between your air fryer and the granite countertop, you can effectively shield it from any potential damage caused by heat over time.

Pro Tip: Introducing a heat-resistant mat maximizes heat protection and enhances stability during the air fryer’s usage.

Is It Safe to Put an Air Fryer on a Stovetop? 

No, placing an air fryer on a stovetop is not recommended under any circumstances. Avoid this placement even if you don’t intend to operate the air fryer while it’s on the stovetop.

The reason behind this caution is the substantial risk involved. The intense heat from a hot stovetop can melt the air fryer, leading to damage. Furthermore, a melted air fryer could trigger a fire, jeopardizing your property and safety.

Hence, resisting the temptation to position an air fryer on a stovetop is imperative. The associated risks are too significant to ignore, and you should neither take this risk nor recommend it to others.


Do Air Fryers Cook Faster – Air fryer or Oven?

In culinary choices, the battle between air fryers and ovens often centres on the pivotal aspect of cooking times. However, this decision encompasses more than just time, especially with the convenient presence of an air fryer on our countertops. In our fast-paced modern lives, where time is a perpetually scarce luxury, the importance of efficient cooking cannot be overstated. This leads to a fascinating question: Do air fryers cook faster?

I’ve considered cooking as a laborious and time-consuming task, a sentiment that shifted significantly upon my recent acquisition of an air fryer. This compact culinary marvel has become an important part of my kitchen arsenal, working alongside my dependable convection oven. Notably, many dishes that once exclusively occupied oven space have now found their counterparts in the air fryer, making meal preparation more flexible and time-saving.

The timeless debate resurfaces: Does the air fryer or the oven wield culinary superiority and efficiency? In an era that values convenience and speed, marketing often emphasizes these attributes. Embracing an automated lifestyle brings comfort and liberates valuable time for other endeavours. For these reasons, among others, my air fryer has taken its place as a vital tool in my cooking repertoire.

While the air fryer’s capabilities are confined to specific domains, particularly in tasks such as ingredient selection, seasoning application, precise slicing, and artful plating, it unquestionably alleviates a significant portion of the cooking burden beyond these creative aspects. This starkly contrasts the oven, which demands vigilant time and temperature management, thereby making cooking a more time-intensive pursuit.

The hallmark of the air fryer is its swift cooking. Its ability to rapidly attain high temperatures (some even reaching 350°F+ within 3 minutes) is attributed to its smaller size and robust power. In this aspect, a distinction arises when compared to the microwave, renowned for its speed. While the air fryer excels, it does fall short of the microwave’s velocity.

A noteworthy point is that the air fryer doesn’t require preheating to achieve delightfully crisp surfaces, a luxury the microwave cannot provide. Despite its convenience, the microwave cannot impart the coveted fried texture to dishes. These two appliances, stemming from distinct culinary philosophies, have honed their crafts separately and effectively.

Do Air Fryers Cook Faster Than Ovens?

Equipped with an average volume ranging from 3 to 5 litres, a power capacity of 1300 to 1500W, and a peak temperature of 200°C, the air fryer boasts commendable performance on par with ovens. However, due to its compact nature, confined within a smaller space, the air fryer achieves swifter cooking speeds than conventional ovens.

Is Using an Air Fryer More Economical Than an Oven?

The economic aspect of utilizing an air fryer versus an oven is contingent upon several variables, including regional electricity rates and the size and model of the appliances. Generally, air fryers exhibit higher energy efficiency than ovens, consuming less electricity and producing less heat. However, this only sometimes translates to overall cost-effectiveness, as factors such as the initial appliance cost and ongoing maintenance expenses should also be factored in. Before making a decision, conducting a comprehensive analysis of both options’ costs and benefits is advisable.

Why Do air fryers Exhibit Faster Cooking Times Compared To Ovens?

Both air fryers and ovens excel at quicker cooking than traditional stoves due to their utilization of hot air circulation through fans. However, the distinction in cooking speeds stems from several factors, elaborated upon below:

Compact Capacity

Physical attributes significantly influence the cooking process. With its smaller capacity, an air fryer possesses heightened heat absorption capabilities, resulting in expedited cooking times.
Despite an oven having dual heating elements versus an air fryer’s singular piece, the differential sizes contribute to distinct cooking speeds.

Heat emanates from the top of the air fryer, directly engaging the food with fan assistance. The shorter distance between the heating element and the food in the air fryer accelerates the cooking process.

In contrast, a larger oven requires the heating elements to attain optimal temperature and uniformly distribute heat throughout its interior. This leads to longer cooking times compared to an air fryer.

Reduced Preheating Interval

Ovens require preheating time for diverse dishes during cooking—a phase referred to as preheating. The air fryer’s preheat interval is two to three minutes. Given the appliance’s rapid and efficient cooking tool, most air fryer recipes omit preheating.

The air fryer’s convection tool expedites cooking by instantly channelling hot air onto the food. This not only hastens the cooking process but also shortens waiting times.

However, the air fryer requires only a brief two-minute preheating period in scenarios necessitating preheating. Conversely, conventional ovens may require 10-15 minutes to attain the desired preheating temperature.

Minimal or No Oil (or Marination) Requirement

Due to its intense heat and air circulation, the air fryer achieves swift cooking without requiring extensive pre-marination or excessive oil usage. Specific recipes even forgo oiling or pre-marinating.

Influential Fan Speed and Size

The air fryer incorporates a high-speed fan that proficiently distributes heat, thereby shortening cooking times. The fan’s speed is approximately 30-35% greater than that of a basic convection oven. The accelerated fan speed also expedites the process of heating the cooking space.

Rapid Cooking Pace

Convection ovens feature smaller fan sizes and lower-speed fans compared to air fryers. The air fryer attains higher temperatures and cooks faster, reaching such temperatures within three minutes, whereas ovens require around 15 minutes to achieve equivalent temperatures.

How much faster does an air fryer cook than an oven?

An air fryer commonly cooks food faster than an oven due to its smaller size, efficient heating mechanism, and focused hot air circulation. Cooking times in an air fryer can be 25-30% faster than traditional oven cooking. However, the exact difference in cooking speed may be founded on factors such as the specific air fryer and oven models, the type of food being cooked, and the recipe used.

Do Air Fryers Cook Faster Than Deep Fryers?

We understand the rapid heating tool of air fryers let’s examine the pace of deep fryers.

In deep frying, using a deep fryer consumes more time than an air fryer, given that the latter only necessitates heating the air. Contrarily, with deep fryers, a significant portion of the delay originates from the substantial volume of liquid needing to reach boiling point before food can be fried.

The culinary change occurs within minutes once the oil attains its boiling point. It’s worth noting that while the air fryer doesn’t replicate the exact crispiness of deep-fried cuisine, it operates sans the use of oil.

Is Preheating Necessary for an Air Fryer?

Experts confirm that preheating an air fryer yields enhanced processing efficiency and crispness. However, it’s crucial to note that the necessity for preheating varies depending on the air fryer model. Some air fryers mandate preheating before cooking, while others do not.

The emergence of oil-less fryers as a popular household appliance underscores its role in facilitating cooking. Such fryers enable users to minimize grease usage, employing only minimal oil to prepare dishes.

Preheating the fryer pot effectively promotes hot air circulation throughout its interior. Consequently, cooking commences when food is placed inside the air fryer. This step also rapidly vaporizes surface moisture, endowing food with a selected golden hue and the intended crispness upon cooking.

Final thoughts

In the ongoing debate of “Do Air Fryers Cook Faster,” air fryers emerge as the clear winners over ovens regarding cooking speed. This is attributed to their compact design, strategic top heating element placement, and the efficient operation of their rapid fan. Notably, the preheating duration of merely two minutes and the air fryer’s swift temperature increase translate to considerably expedited meal preparation compared to traditional ovens.

While ovens shine in tasks like bulk cooking and offering versatile cooking modes, it’s essential to recognize that both appliances boast unique advantages. By exploring the benefits above and the diverse food preparations, you can make an informed decision that suits your culinary preferences. For those with the space and means, owning both appliances could enrich your culinary journey, granting you a more comprehensive array of options and delectable meals. Best of luck in your culinary endeavours!

Can you use air fryer without tray or rack? Update 2023!

The question, “Can you use air fryer without tray or rack?” has ignited the curiosity of culinary enthusiasts. This article delves into the unconventional practice of operating an air fryer without its standard rack or tray. While these components have traditionally played a crucial role in achieving crispiness, a growing interest in attaining a softer, moister texture is emerging. This article thoroughly explores the viability of bypassing the rack or tray and the potential to create additional cooking space. Delve into the advantages and considerations of this method, along with its implications for improving culinary innovation and convenience.

So can you use air fryer without tray or rack? The answer is yes, you can use an air fryer without the rack or tray. This alternative approach allows you to customize your cooking effects. Without the rack or tray, you have more flexibility in achieving different surfaces, such as a slightly moist or steamed outcome, rather than always aiming for maximum crispiness. Additionally, omitting the rack or tray provides extra cooking space, helping you to cook larger or multiple items simultaneously. Remember that experimenting with this method might require adjustments to cooking times and processes, but it offers an opportunity to explore various culinary options.

Can you use air fryer without tray or rack

Expecting Results When Cooking Without the Tray/Rack

When opting to cook without the tray or rack in your air fryer, specific results can be expected:

Dripping of Excess Oils

The absence of the tray allows excess oil, fat, or butter to drip down from the food as it cooks suspended in the air. Cooking in this manner may lead to the accumulation of these drippings.

Altered Appearance

Different from the usual appearance of meats with a skinny fat cut, cooking without the tray will yield a different visual result due to the dripping fats not being collected.

Fat Collection

Fat from the cooking process will gather at the bottom of the air fryer. It can contribute to a persistently greasy quality in the cooked food.

Pooling Grease

Without the usual tray, any surplus grease that typically drips from meats will form a pool around the cooked food.

Use of Liners

To mitigate the adherence of extra grease to the base, using a liner underneath the food might be advisable before initiating the cooking process.

Texture Changes

With the airflow circulation facilitated by the tray or rack, the texture of the food is likely to remain the same. Expect a reduction in crispiness and an increase in moistness or steaminess.

In summary, it’s essential to consider the potential effects on appearance, texture, and grease accumulation when cooking without the tray or rack. Using a liner can aid in managing grease while acknowledging the alteration in texture allows for a better understanding of the cooking process.

Is it safe to use an air fryer without the basket?

Using an air fryer without the basket can pose safety risks and is generally not recommended. The basket serves multiple purposes, including holding the food, allowing air circulation for even cooking, and preventing direct contact between the heating element and the food. Without the basket, there’s a higher probability of uneven cooking, potential damage to the heating element, and increased risk of burns due to direct contact with the hot surfaces inside the air fryer.

Following the factory’s guidelines and recommendations for using your air fryer safely and effectively is important. If you’re looking for different cooking results, consider experimenting with adjusting cooking times and temperatures while still using the designated accessories provided with the air fryer.

Do All Air Fryers Come with Trays?

Regardless of the air fryer model you choose, it will generally include a crisper tray. Depending on the specific model, you might receive a single rack as an accessory.

It’s highly recommended to review the accessories when purchasing an air fryer carefully. It can save you the trouble of hunting for specific recipe accessories.

Locating suitable accessories that fit within the air fryer compartment can be challenging. The more comprehensive the accessories the brand provides, the wider the culinary possibilities you can explore.

Additionally, brands often include accessories due to the difficulty in finding standalone parts compatible with their air fryer models.
It’s worth noting that there isn’t a universal standard size that fits all air fryers. Each air fryer manufacturer designs products with varying lengths, designs, capacities, and unique dimensions.

The crisper tray or hanging basket usually features numerous holes at the bottom. These holes significantly improve airflow circulation and aid in draining excess grease from fatty foods.

How To Use An Air Fryer Without A Tray

Using an air fryer without a tray may offer some cooking flexibility. Here’s how you can effectively use your air fryer without a tray:

  • Lining the Bottom: To prevent food from sticking and to make cleanup easier, consider lining the bottom of the air fryer with aluminum foil. This protective layer can also help distribute heat more evenly.
  • Food Placement: Place your food directly on the foil-covered bottom of the air fryer. Make sure not to overcrowd the air fryer to allow for proper air circulation and even cooking.
  • Flip and Shake: Since there won’t be a tray to promote even cooking, it’s important to flip or shake your food occasionally during the cooking process. This helps prevent uneven browning or burning.
  • Preheating: Preheat the air fryer for a few minutes before placing the food inside. This ensures the cooking chamber is at the desired temperature, promoting better cooking results.
  • Adjust Cooking Times: Cooking times might need adjustment when using the air fryer without a tray. Since food directly interacts with the heating element, it might cook faster. Observe the cooking process closely and make necessary adjustments.
  • Cleaning: After cooking, allow the air fryer to cool down before removing the foil and cleaning any food residue. Be careful when handling the hot foil.

Remember, while this process offers more flexibility, it’s important to prioritize safety. Be cautious when using the air fryer without a tray, as direct contact with the heating element and hot surfaces can lead to burns or uneven cooking. Always follow manufacturer guidelines and recommendations for safe use.

The Prime Air Fryer Choice for Tray-Free Cooking

If you’re searching for an air fryer that doesn’t require a tray, the Ninja Airfryer emerges as an exceptional option. What sets it apart is the easy removal of its crisper tray, enabling hassle-free cooking without needing a tray.

What truly elevates the Ninja Airfryer is its remarkable versatility. Beyond its proficient air frying capabilities, it extends its utility to dehydrating, reheating, and roasting functions.

Furthermore, the convenience extends to clean up, with the basket and crisper plate being dishwasher-safe, simplifying the post-cooking tidying process.

Alternatives to the Air Fryer Tray or Rack

Enhancing your air frying experience without the traditional tray or rack is achievable through several alternative options:

Metal Rack for Air Fryer Cooking

Incorporating racks into your air fryer routine can elevate your cooking endeavours. They introduce extra cooking surfaces and help segregate various foods. Moreover, they aid in achieving a crispy texture by allowing fats to drip away. It’s essential to recognize that the fats from the upper rack might drip onto the lower one. Single or multiple frames can effectively replace the conventional tray in your air fryer.

Liner for Air Fryer

Utilizing silicone liners is recommended, as they safeguard the surface underneath while enhancing the cooking process.

Silicone Pot

Embracing a silicone pot as an alternative to the standard air fryer tray offers convenience and versatility. Available in diverse shapes and sizes, these pots secure and support food as effectively as the air fryer’s non-stick base. The benefits extend beyond simplified post-cooking cleanup; silicone pots are heat-resistant, non-toxic, and crafted from food-grade materials. Additionally, they are reusable and dishwasher-safe.

Other Accessories

Other accessories like tins, pans, and grill pans can also replace the tray. Ensure compatibility with your air fryer’s dimensions to prevent any potential damage.

Whatever alternative you choose, ensure it fits your air fryer’s dimensions to prevent unintended damage. Each option presents a unique way to customize your cooking experience while eliminating the need for the traditional tray or rack.

Things to Remember While Using the Air Fryer Without the Tray or Rack

Here are important pointers to remember when utilizing an air fryer without its tray:

Maintain Adequate Space

To provide optimal cooking outcomes sans the tray, prioritize consistent airflow around the food. It entails spacing out the items and creating gaps between them to help unobstructed circulation.

Midway Rotation and Shaking

Attain livery cooking by flipping, shaking, or tossing the food midway through the cooking process. This technique guarantees even cooking on both sides, resulting in a satisfyingly crispy texture.

Segmenting Larger Meat Portions

Improve the cooking process for more significant meat cuts by slicing them into smaller portions. This strategic move fosters improved airflow, ultimately facilitating even cooking. Constantly remember to allocate enough room between these smaller portions for optimal results.

Employ a Thermometer for Precision

Containing a thermometer in your air frying routine, especially when cooking without the tray, is indispensable. This tool monitors the cooking progress and ensures thorough food preparation. Ignoring a thermometer could lead to undercooked dishes, risking potential health concerns. Therefore, always appreciate the importance of using a thermometer during tray-free air frying.

In Conclusion

Can you use air fryer without tray or rack?” Cooking in an air fryer minus the tray or frame is a practical choice, offering advantages. To maximize outcomes, consider these guidelines. By adhering to these recommendations, you can confidently achieve flawlessly cooked dishes every time you use your air fryer in a tray-free manner.

How to clean instant pot air fryer lid – All things that you should know!

The popularity of instant pot air fryers stems from their remarkable capacity to uphold both cooking time and quality. This attribute not only economizes time but also reduces ingredient consumption.

However, extended usage can result in the accumulation of stubborn grease on the lid, which may lead to severe damage to the appliance. We have compiled comprehensive guidelines on effectively cleaning an instant pot air fryer lid to assist with this common concern. Delve deeper to uncover the solution and methods for “How to clean instant pot air fryer lid”.

How can you wash your Instant Pot air fryer lid?

The method for washing the instant pot air fryer lid hinges on its usage and cleaning frequency.

A specific procedure should be followed if the lid undergoes daily use and cleaning. However, an alternate method is required if the top is utilized and cleaned infrequently. The following are comprehensive step-by-step instructions for both scenarios.

Regular Cleaning Routine

For those who maintain a regular cleaning regimen for their instant pot air fryer lid, the method is straightforward and doesn’t demand significant time investment.

Step 1: Clean the Cooking Pot

Clean the cooking pot before attending to the instant pot air fryer lid. It prevents leftover food or residue from transferring onto the top during cleaning. Placing the cooking pot in a dishwasher ensures its cleanliness without hassle.

Step 2: Clean the Silicon Ring

After cooking, a residue may accumulate around the silicon portion of the lid. Before using the top again, thoroughly wash this ring. Gently detach the silicon part and clean it using liquid soap and a soft sponge or brush.

Step 3: Clean the Lid

As this lid is cleaned daily, there’s no need to disassemble its components. It can be placed in a dishwasher for cleaning. Alternatively, it can also be cleansed using liquid soap and a sponge.

Step 4: Dry and Polish

Invert the lid and cooking pot to drain any excess water. Employ a microfiber cloth to meticulously wipe the jar and lid, ensuring no moisture remains to prevent rust or harmful substance accumulation.

Step 5: Thorough Cleaning (Monthly or Every 2 Months)

For consistent Instant Pot users, a comprehensive cleaning is recommended every month. If usage is less frequent, you can opt for cleaning every two months. Before starting the cleaning process, ensure the appliance is unplugged and its cord is stored safely to prevent any contact with moisture.

To maintain the cleanliness of your Instant Pot, wipe the lid or the area it is in contact with inside the pot using a damp cloth or paper towel. This practice prevents the accumulation of dirt or food remnants on the surface.

Furthermore, pay attention to cleaning smaller components such as the “quick release” handle, the metal shield encompassing the steam valve, and the condenser cup. These elements can trap food particles and residue, necessitating their removal and thorough washing with warm soapy water.

To conclude the cleaning regimen, rejuvenate your pot’s aroma by adding 1 cup of vinegar, 1 cup of water, and the zest of a single lemon to the inner pot. Securely fasten the lid and set the Instant Pot to steam for 2 minutes. After completion, your pot will emerge both immaculate and fragrant.

Occasional Deep Cleaning

If your schedule doesn’t allow for regular cleaning of the instant pot air fryer lid, it can lead to a significant buildup of grease and stains. In such cases, two techniques can be employed. Both methods are detailed below.

Method 1: Vinegar and Liquid Soap Method for Cleaning Instant Pot Air Fryer Lid

Step 1: Prepare the Cleaning Solution

Begin by gathering a small dish. Combine approximately one cup of white vinegar and two to three spoonfuls of liquid dish soap in the dish.

Step 2: Immerse the Components

Submerge the plate, heating unit, fan, and screws into the mixture of white vinegar and liquid dish soap. Ensure that the variety fully covers all the elements. Adequate coverage is essential to effectively remove grime and residue from the instant pot air fryer lid.

Step 3: Allow Soaking Time

Let the plate, coil, fan, and screws soak in the mixture for 12 to 15 minutes. If removed prematurely, the accumulated grime won’t soften sufficiently for effective removal.

Step 4: Gently Scrub with a Brush or Sponge

Using a brush with soft but dense bristles or a smooth sponge, gently scrub the dirt and grime if a meeting is unavailable. Avoid excessive pressure while cleaning to avoid damaging the plate, coil, and fan.

Step 5: Cleaning and Drying

After using the brush or sponge, ensure they are adequately cleaned or, ideally, use a clean and dry brush or sponge. Employ the brush and clean water to eliminate any soapy residue and remaining dirt from the instant pot air fryer lid.

Once adequately cleaned, invert the components and give them a slight shake to remove excess water. Use a microfiber cloth to dry the lid and its features thoroughly. Inadequate drying could result in the development of rust over time.

Method 2: Liquid Dish Soap and Warm Water Method for Cleaning Instant Pot Air Fryer Lid

Liquid Dish Soap and Warm Water Method

Step 1: Prepare the Cleaning Solution

Mix liquid dish soap with warm water in a bowl, dish, or bucket, ensuring the mixture reaches the rim of the container.

Step 2: Submerge the Components

Immerse the coil, fan, and screws in the warm soapy water solution. Ensure they are completely submerged in the mixture. Complete immersion is crucial for effectively eliminating grease and grime.

Step 3: Allow Components to Soak

Leave the screws, fan, and coil in the mixture for approximately 10 to 12 minutes. Sufficient soaking time ensures that grease and grime are properly softened for efficient cleaning.

Step 4: Clean the Lid of the Body

The plastic body of the lid also requires cleaning. Neglecting this part defeats the purpose of cleaning the coil and fan, as they will quickly become dirty once the top is reassembled. Thus, cleaning the lid body is essential to maintain overall cleanliness.

Step 5: Clean the Lid Surface

Grab a microfiber cloth and, if available, a pair of cleaning gloves. Dip the material into the warm water and soap mixture, then gently rub it over the lid. It removes grease, stains, and grime, leaving the top sparkling clean.

Step 6: Remove Components from the Solution

Retrieve the lid components from the mixture of liquid soap and warm water. The dirt and stains should come off the parts quickly.

Step 7: Gently Scrub the Parts

Use a brush with soft and dense bristles or a soft sponge to gently scrub dirt from the coil, fan, and screws. Ensure you wash gently to avoid scratching the valuable instant pot air fryer.

Step 8: Rinse and Dry

After removing all the grime and stains, rinse the coil, screws, and fan with fresh water. Then, place these parts in white vinegar using a cleaning container. Allow the lid parts to soak in the vinegar for approximately 8 to 10 minutes. Subsequently, use a microfiber cloth to eliminate any residual moisture.

Step 9: Reassemble the Components

Reattach all the previously removed components to the lid using an appropriate screwdriver for your instant pot air fryer model. Now that you know how to effectively clean the instant pot air fryer lid avoid allowing it to go uncleaned for extended periods, as neglecting this maintenance can result in consequences. Make it a practice to clean the top regularly to provide optimal performance and longevity for your cooking machine. Remember, a little cleaning effort can yield substantial benefits in the long run.

FAQS

Is Baking Soda Suitable for Cleaning?

Using baking soda to clean the lid of your air fryer is not advisable. While baking soda is effective for cleaning, its abrasive nature can harm the lid’s delicate surfaces, such as heaters and fans. It might also strip away protective coatings. Instead, opt for mild liquid soap and lemon liquid to clean. Avoid using salt for scrubbing, as its rough texture can cause damage.

Can You Clean Your Instant Pot Air Fryer Lid in a Dishwasher?

Remember that the air fryer lid is relatively heavy, weighing around 11 pounds, and should not be placed in a dishwasher. Attempting to do so can damage both the top and the dishwasher. Dishwashers employ high temperatures that can cause the paint on the lid to melt and harm the heating elements and fans within the appliance.
Always refer to the manufacturer’s manual for specific lid cleaning instructions for safe and proper cleaning. Adhering to these guidelines will prevent potential damage and maintain the condition of your air fryer.

How Frequently Should You Clean the Instant Pot Air Fryer Lid?

Maintaining the cleanliness and condition of your Instant Pot lid is vital for safety and durability. Cleaning frequency depends on your usage patterns. Consider your usage frequency to determine the appropriate cleaning schedule.
For instance, if you use the Instant Pot weekly, cleaning the lid every two weeks is recommended to ensure its cleanliness and safe usage. Prioritizing hygiene is essential for your safety and your family’s well-being. By adhering to regular cleaning routines, you can safeguard against harmful microorganisms and prolong the life of your Instant Pot.

In Conclusion

Proper cleaning and maintenance are crucial for efficient and safe air fryer usage. However, many users need to pay more attention to these aspects, leading to operational and health-related issues.
The air fryer lid is a critical component that facilitates efficient food processing. Yet, it can accumulate oil, stains, and debris over time. Neglecting regular cleaning can turn the lid into a breeding ground for harmful substances that jeopardize health.
To ensure your family’s and yourself’s well-being, prioritize regular air fryer cleaning and maintenance. This article provides valuable insights into air fryer lid cleaning. We hope this information enhances your understanding and appreciation for maintaining a hygienic air fryer environment. Thank you for reading.

Can you decarb weeds in an air fryer? Revealing the Possibilities!

In today’s households, the hot air cooker has gained considerable popularity, offering a delightful and healthier method to prepare a range of fried or grilled dishes. It eliminates concerns about oily splatters while ensuring the well-being of your health. Can you decarb weeds in an air fryer? Let’s delve into this inquiry. Furthermore, decarboxylating weed is also a crucial step before its usage. But can you effectively perform decarboxylation using an air fryer? Let’s explore this question while emphasizing the importance of cautious temperature control and mindful usage to prevent waste.

Is Decarbing Weed Possible in an Air Fryer?

You can decarboxylate weed using a hot air cooker, but following the correct steps is essential to ensure effectiveness. Proper temperature control is critical. Start by setting your air fryer to 250 degrees Fahrenheit (120 degrees Celsius). Using excessive heat can damage the decarboxylation process. The recommended duration for decarbing is up to one hour. To enhance the process, consider stirring the weed halfway through and continuing for an additional 30 minutes.

Alternatively, a more straightforward method involves placing the weeds in the air fryer basket and cooking it at 240 degrees Fahrenheit (115 degrees Celsius) for 10 minutes. Subsequently, allow the weed to cool down before incorporating it into recipes that require decarboxylated cannabis.

For the first technique, ensure an even weed distribution in the hot air cooker basket. Cook for approximately 20-30 minutes, intermittently stirring to achieve a uniform browning and crisp texture. Always let the decarbed weed cool before using it.

Using these two distinct approaches, you can effectively decarb weed using an hot air cooker. This offers convenience and opens up possibilities for creating flavorful and health-conscious culinary delights.

Optimal Temperature and Cooking Times for Precise Weed Decarb

Achieving perfect decarboxylation of weed relies heavily on precise temperature and timing. Without these necessary factors, the process can quickly go wrong, resulting in burned or badly decarbed weed.

Crucial Temperature Range: Decarboxylation of weed is best achieved within the temperature range of 220 to 250 degrees Fahrenheit. However, it’s critical to acknowledge that individual cannabinoids and terpenes necessitate distinct temperature parameters.

Temperature and Time Guidelines for Specific Compounds: THCa necessitates decarboxylation temperatures of 220 to 240 degrees Fahrenheit, requiring 30 to 45 minutes. In difference, CBDa demands a lengthier cooking time of up to 90 minutes within the same temperature range.

Decarboxylation Time Variability: The duration required for decarboxylation hinges on factors such as the type of plant material and the quantity being processed. Commonly, longer cooking times at lower temperatures play a pivotal role in maintaining the full spectrum of valuable compounds, maximizing their health benefits.

Do You Need to Grind Weed Before Decarboxylation?

While some formulae recommend grinding weed before the decarboxylation process, it’s not a recommended practice. Grinding weed before decarboxylation can lead to the loss of terpenes within the trichomes. Trichomes are focused at the base of the Kief collection chamber.

It’s enough to break the weed into a relatively fine texture to preserve these compounds to the fullest extent possible. This can be easily achieved using your fingers. Hence, grinding is not required at all.

How to decarb weeds in an air fryer?

Decarboxylating weed with an air fryer offers a more straightforward method than an oven.

Essential Tools and Ingredients:

  • An hot air cooker
  • Aluminum foil
  • Weed plant
  • Oven-safe baking dish
  • Cheesecloth or mesh filter

Step-by-Step Guide:

  • Set Temperature and Time: Set the hot air cooker to 250 degrees Fahrenheit and adjust the cooking time to 60 minutes.
  • Prepare the Plant Material: Unlike grinding, which could lead to terpene loss, gently break down the plant material into small to medium-sized pieces using your fingers.
  • Arrange the Weed: Create a thin layer of the broken-down weed within the oven-safe baking dish.
  • Cover with Foil: Shield the baking dish using aluminum foil, puncturing small holes throughout. This facilitates the release of air during the decarboxylation process.
  • Place in the Air Fryer: Position the weed-filled dish in the basket. Pause the hot air cooker at the 30-minute mark or halfway through. Gently shake the baking dish to evenly distribute the weed, promoting consistent decarboxylation.
  • Check for Color: Take it out of the air fryer once the weed turns a rich golden brown.
  • Cooling Down: Allow the weed to cool at room temperature, which generally takes about thirty minutes.
  • Finalizing the Process: After the cooling period, the decarboxylation process concludes.

Using an hot air cooker simplifies the decarboxylation process with these straightforward steps, streamlining the procedure compared to traditional oven methods.

How can you decarb weeds without smell?

During the decarboxylation process, an unpleasant odor is released, mainly when working with more than a few grams. This smell can become quite substantial.

However, there are several approaches you can take to reduce the odor.

  • Oven Bag Method: One effective way is by using an oven bag. Place the weed inside the bag and then into the air fryer. Oven bags are safe for use with air fryers. Ensure you leave a portion of the bottom surface exposed rather than completely covering it.
  • Mason Jar Technique: Another option is to use a mason jar in the hot air cooker. Ensure that the pots you use are heat-proof. Remember that this method is suitable for smaller batches at a time.

By employing these methods, you can significantly mitigate the pungent odor that typically accompanies the decarboxylation of weed.

Consequences of Over-Decarboxylating Weed

As previously emphasized, time and temperature are critical factors in the decarboxylation process. So, what occurs when weed is decarbed for an extended period? Several outcomes should be anticipated.

  1. Flavor Loss: Primarily, the flavorful characteristics that contribute to the enjoyable taste of the weed will diminish. In fact, excessively decarbed weed might resemble and taste similar to burnt food.
  2. Aroma and Texture Impact: Furthermore, you can expect a negative impact on the aroma and the overall consistency of the weed. These attributes could be compromised when over-decarboxylating.
  3. THC Degradation: A critical component of weed is THC, which contributes to its potency and appeal. Excessive decarboxylation can lead to the significant breakdown and destruction of THC and CBD compounds within the weed, potentially rendering them ineffective or significantly reduced in potency.

It’s essential to strike the right balance during the decarboxylation process to preserve the weed’s desired flavors, aromas, and potency.

What are the advantages of using an air fryer to decard weeds?

Using an air fryer to decarboxylate weed offers several benefits compared to using an oven. There are some of the advantages:

  • Faster Process: Air fryers typically heat up faster than ovens, allowing you to start the decarboxylation process sooner.
  • Even Heating: Hot air cookers use a convection mechanism that evenly circulates hot air around the weed. This can result in more consistent decarboxylation throughout the batch.
  • Precise Temperature Control: Many hot air cookers offer particular temperature settings, allowing you to set the exact temperature required for decarboxylation.
  • Energy Efficiency: Air fryers are generally more energy-efficient than ovens, which can be advantageous for longer decarboxylation times.
  • Less Odor: While there will still be an odor when decarboxylating weed, using an hot air cooker with a closed lid might contain the smell better than an oven, which could be helpful if you’re concerned about odors.
  • Smaller Batch Size: Air fryers are typically smaller than ovens, which can be beneficial if you decarboxylate a small amount of weed.
  • Ease of Use: Hot air cookers often come with presets and timers, making setting the correct cooking time and temperature convenient.
  • Reduced Risk of Burning: An air fryer’s even heating and controlled environment might reduce the risk of accidentally burning the weed during the decarboxylation process.

However, it’s important to note that using a hot air cooker for decarboxylation might require some trial and error to find the optimal settings for your specific batch of weed, as different air fryer models may vary heat distribution and performance.

Is there any disadvantage to using an air fryer to decard weeds?

While using a hot air cooker for decarboxylating weed can offer several advantages, some disadvantages should be considered:

  • Higher Initial Cost: Air fryers can be more expensive than other cooking tools, which might not be cost-effective if you only use them for decarboxylation.
  • Small Size and Capacity: Most have a hot air cooker limited capacity due to their small size, making it challenging to decarboxylate larger quantities of weed at once.
  • Temperature Control Challenges: Some air fryers might have less precise temperature control than ovens, which could impact the accuracy of the decarboxylation process.
  • Limited Applicability: Not all weed strains might be suitable for decarboxylation in an air fryer. Experimentation might be required to determine if your specific weed works well with this method.
  • Skill and Experience: Using a hot air cooker effectively for decarboxylation requires skill and experience to ensure that you achieve the desired results without under-decarboxylating or over-decarboxylating the weed.
  • Cleaning and Maintenance: Cleaning the minor components of an air fryer can be more time-consuming than other decarboxylation methods.
  • Uniformity of Decarboxylation: An air fryer’s small size and air circulation might lead to uneven decarboxylation if not carefully monitored and adjusted.
  • Noise and Odor: Hot air cookers can generate noise and release odors during operation, which could be a concern depending on your living situation.

In conclusion, while air fryers offer convenience, there might be better choices for some. It’s essential to weigh the pros and cons and determine if an air fryer aligns with your needs and preferences for decarboxylating weed.

How To Dry Peppers In Air Fryer: 4 Steps You Should Know!

Welcome to our blog, Big Sun Cook! Today, we are excited to share a quick and easy method for drying peppers using an air fryer. Not only does this oil-free fryer cook food rapidly, but it also serves as an excellent tool for drying peppers without excessive grease.

Dried peppers are incredibly versatile. They can be used to season various dishes, add vibrant colors to garnishes, spice up spices, and even enhance the flavors of instant noodles. Thanks to the air fryer, drying peppers has become quicker and simpler than ever before.

In this article, we will provide you with a step-by-step guide on how to dry peppers in an air oven. You will learn how to prepare the peppers and adjust the air fryer for optimal results. We will also share valuable insights on the ideal time and temperature, selecting the right type of chili, and other useful tips for successfully air-drying peppers!

Why Should You Dry Peppers in Air Fryer?

Drying peppers in an oil free fryer is not recommended. Oil less fryer are mainly used for cooking food with hot air to create a crispy texture, not for drying. There are better options for drying peppers due to a few reasons:

  • Uneven drying: Oil less fryers are designed to evenly cook food, but drying peppers requires consistent airflow and low humidity, which an air fryer may not provide.
  • Moisture retention: Peppers contain moisture and proper drying needs a controlled environment with low humidity. Air fryers are not specifically designed for dehydrating food, so they may not effectively remove water from peppers, leading to insufficient drying and affecting the quality and shelf life of the peppers.
  • Limited capacity: Oil less fryers have limited space, typically suitable for smaller food quantities. Drying peppers often requires larger amounts, especially when preserving a large harvest or for future use. The limited capacity of an air fryer may make it impractical to dry a significant amount of peppers.

Instead, it is generally advised to use alternative methods such as air drying, oven drying, or using a specialized food dehydrator to dry peppers. These methods offer better control over the drying process, ensuring consistent airflow, reduced humidity, and proper moisture removal from the peppers.

What types of chilies to dry?

Drying chilies in an oil less fryer can be a convenient and efficient method. Some chili varieties that work well for air frying include serrano peppers, Thai chilies, Cayenne peppers, and red Fresno peppers.

  • Bell peppers are not typically dried due to their high water content and thick flesh but you can still use an oil less  fryer to roast them for a delicious and versatile culinary application.
  • Preserving the spiciness of serrano peppers is possible by drying them in an oil-free fryer. This allows you to use them as chili flakes or powders in various recipes.
  • Thai chilies(pepers) are small but extremely hot, making them a popular choice for adding fiery heat to dishes. Air drying them in an air fryer helps intensify their spiciness.
  • Cayenne peppers are known for their medium to high heat levels. Drying them in an oil-free fryer is an excellent way to preserve them for future use. Once dried, you can grind them into a fine powder or crush them into flakes to add heat to different recipes.
  • Red Fresno peppers can also be dried in an oil-free fryer. The resulting chili flakes or powders can be sprinkled on pizzas or added to soups for an extra kick.

How to dry chilies in an air fryer

Let me provide you with an expanded version of the steps for drying peppers in an oil less fryer, highlighting the benefits of using an oil less fryer  for this process:

Step 1: Prepare the ingredients and tools

  • Gather your favorite type of fresh peppers and an air fryer. Rinse the peppers with cold water and pat them dry with a paper towel.

Step 2: Prepare the peppers

  • Cut off the stems of the peppers and remove the seeds inside (based on your preference).
  • Next, cut the peppers into small pieces, thin slices, or leave them whole, depending on the type of pepper and your desired preparation.

Step 3: Dry the peppers in the air fryer

  • Turn on the air fryer and set the temperature to about 180-200°C (350-390°F).
  • Wait for the air fryer to preheat to the desired temperature.
  • Place the pepper pieces into the air fryer basket. Ensure they are spread out evenly and not stacked on top of each other.
  • Cover the air fryer and dry the peppers for about 5-7 minutes. The drying time may vary depending on the size and thickness of the peppers.

Step 4: Finishing touches and storage

  • Once the peppers have dried and become crisp, turn off the air fryer.
  • Use tongs or a spoon to transfer the dried peppers from the air fryer basket to a plate or storage container. Allow the peppers to cool completely before storing them in an airtight container.
  • You can use the dried peppers as a flavorful addition to your dishes or crush them into flakes for seasoning.
  • These revised steps will guide you through the process of drying peppers in an air fryer, resulting in crispy and preserved peppers without the need for oil. Enjoy the convenience and rich flavor of dried peppers in your cooking!

Tips and Warnings on How to Dry Peppers in Air Fryer

Drying peppers in an air fryer is an easy way to keep their taste. Here are some key reminders and cautions:

Tip

Warning

  • Make sure there is enough ventilation to avoid irritation from strong scents.
  • Wash and dry the peppers before slicing.
  • Wear gloves when handling hot peppers.
  • Set the temperature of the air grill to low (about 120°F to 140°F or 50°C to 60°C).
  • Avoid putting too many peppers in the air grill basket.
  • Monitor and rotate the peppers to allow for an even drying.
  • Be careful with the high level of spiciness once the chili has dried.
  • Test the dryness by crushing the chili easily.
  • Store dried peppers in an airtight jar and in a cool, dry place.

Final thoughts

Our above article Big Sun Cook, has explained to you how to fry pepper in an air fryer. We hope you can make your own delicious chilies. Thank you for reading our article. If you have any questions, please leave a comment below the article and we will try to answer quickly as possible!

Air Fryer Touch Screen Not Working – Exploring Swift Solutions!

Have you ever experienced a situation where your air fryer touch screen becomes unresponsive? It can be frustrating when you’re excited to cook a yummy meal but unable to make changes to the settings. However, there’s no need to worry as this article is here to assist you in understanding the causes and providing solutions to overcome this issue. We’ll discuss how to fix the air fryer touch screen not working, ensuring that you can enjoy the delicious meals that an air fryer has to offer without any difficulties.

3 Common Causes for Air Fryer Touch Screens Not Working

Experiencing a non-functional touch screen on your air fryer can irritate and throw off your cooking plans. Several factors could contribute to this issue, including unresponsive touch inputs, faulty touch keys, and diminished sensitivity. In the following sections, we’ll delve into these potential causes and offer guidance on troubleshooting and resolution. So, let’s explore three common reasons for air fryer touch screens not working:

The fryer touchscreen does not work when interacting

Cause: The touch screen of an air fryer may stop responding to touch inputs, which can cause inconvenience while navigating menus or adjusting cooking settings. This issue may stem from various factors, such as software glitches, calibration problems, or a faulty touch sensor.

How to fix: To resolve this problem, please follow these instructions:

  1. Try restarting the air fryer.
  2. Check for any available firmware updates.
  3. Calibrate the touch screen.
  4. If the issue persists, kindly contact customer support for further assistance.

The air fryer is less sensitive

Cause: If the touch screen on your air fryer is not responding, it could be due to reduced sensitivity. You may need to apply more pressure or try multiple times to register the input on the screen. It can happen when the screen is worn out or when dirt, grease, or food particles accumulate, affecting touch sensitivity.

How to fix: To resolve this problem, you can follow these steps: 

  1. Wipe the touch screen clean. 
  2. Take off any screen protectors. 
  3. Fine-tune the touch pressure.

A faulty air fryer touches key

Cause: If certain sections or buttons on the air fryer touch screen are not responding, it could indicate a malfunctioning touch key. Touch keys can deteriorate or get damaged as time passes, making them stop working correctly. It can hinder your capacity to choose options or give instructions on the air fryer.

How to fix: To fix this problem, follow these steps: 

  1. Clean the touch keys.
  2. Check for any physical damage.

Suppose you need more confidence in fixing or troubleshooting the touch screen. In that case, it is advisable to seek help from the manufacturer or experts to prevent further damage to your device.

Some other reasons that could cause for air fryer touch sreen not working

Additional factors that might lead to the malfunctioning of your air fryer’s touchscreen. Understanding the possible causes and appropriate remedies can help restore its functionality. Here, we amalgamate the root reasons with their corresponding solutions:

Common Causes of Air Fryer Touch Screen Problems:

  • Inadequate Socket Connection: The simple oversight of an improperly connected plug can hinder touchscreen performance.
  • Damaged Power Socket: If the socket is damaged, it can impede the touch screen’s operation.
  • Worn or Damaged Cable: Regular movement can lead to cable wear, affecting touchscreen responsiveness.
  • Blown a fuse: A blown fuse in the power cord can lead to an unresponsive touch screen.
  • Electrical Instability: Insufficient electricity flow or voltage irregularities can lead to touchscreen glitches.
  • Obstruction Interference: Objects obstructing the touch screen can disrupt its sensitivity.
  • Grease Accumulation: Grease buildup on the touch panel can compromise its sensor functionality.
  • Impact Damage: A fall from a certain height can cause physical damage and result in touch screen issues.
  • Manufacturing Defects: Technical shortcomings or defects in manufacturing can be underlying causes.
  • Voltage Overload to Membrane Switch: High voltage can stress the membrane switch, impacting the touch screen’s performance.
  • Membrane Switch Deterioration: Worn-out wires in the membrane switch can lead to touch screen failure.
  • Control Board Malfunction: Damage to control board components can hinder touch screen operations.
  • Subpar or Counterfeit Product: Poor-quality or fake air fryers can cause touchscreen malfunctions.
  • Memory Card Concerns: Memory card issues can affect display performance in specific air fryer models.
  • Aging Touch Screen: Over time, touch screens can naturally become less responsive due to wear.
  • Hygiene Neglect: Regular and proper cleaning is essential to maintain touch screen efficacy.

Practical Strategies to Address Touch Screen Concerns:

  • Maintain Cleanliness: Routinely clean the touch screen to eliminate grease and debris.
  • Check and Replug: Ensure a secure plug connection and assess the outlet functionality.
  • Alternate Socket Testing: Experiment with different sockets to rule out power source issues.
  • Verify Power Outage: Confirm availability and evaluate your air fryer’s electricity flow.
  • Obstruction Removal: Maintain an unobstructed touch screen by avoiding interference.
  • Address Moisture Exposure: If exposed to moisture, thoroughly dry the air fryer before use.
  • Gentle Edges Tapping: Gently tap the touch screen edges to reposition if any displacement occurs.
  • Optimize Door Support: Ensure the air fryer door is aligned for optimal touchscreen operation.
  • Professional Assistance: Seek expert advice if the remedies mentioned above prove ineffective.

Handling an Air Fryer Without Electricity

When your air fryer’s touch screen fails to function, there could be a brief explanation. It might not be turned on, or the issue could stem from an unstable power supply, a broken wire, or improperly functioning touch keys.

Check the Power Supply

Firstly, ensure the air fryer’s plug is correctly inserted, and the power cord is intact. Confirm whether the supplied voltage is stable or fluctuating.

Inspect Assembly Joints

If your air fryer is unresponsive or not receiving power, meticulously examine the assembly joints during installation. Ensure that all parts have been properly installed. Sometimes, missing or misaligned components can directly impact cooking performance.

Try a 15-Minute Reset

If your air fryer remains inactive for an extended period and fails to illuminate upon being turned on, attempt turning it off for around 15 minutes before restarting it. Ensure the power supply is stable and steady, and properly adjust the timer knob. You can use the air fryer to prepare your desired dishes.

Consider Replacements

If expert assistance doesn’t yield satisfactory results, consider contacting the seller for potential replacement options. The air fryer may be repaired or exchanged as necessary if it is under warranty.

If you possess the required expertise, you could consider the following steps:

  • Thoroughly inspect and repair the switch if it’s bent.
  • Replace the memory card if deemed necessary.
  • If the wires connected to the touch screen are faulty, proceed to remove and replace them.

Ensuring correct grammar and sentence structure is essential to convey information accurately and clear

Conclusion

Thus, you can know the common problems of the air fryer and how to use it properly to minimize unfortunate issues. Please share this valuable information to help everyone be equipped with more knowledge when using this product.

How to use an air fryer? For first time user – Update 2023

How to use an air fryer? How to clean the oil-free fryer? It must be a question that many homemakers are interested in because oil-free fryers are increasingly appearing in family kitchens. To know more about how to use an air fryer for dummies and maintain a healthy fryer and more helpful information about the oil-free fryer, let’s read the article below with Big Sun Cook!

How to Turn on an Oli Less Fryer

If you want to know how to use a healthy fryer, first know how to turn on the oil-less fryer! To turn on the oil-less fryer, you can follow these steps:

Step 1: Ensure the machine is correctly plugged into the power outlet.

Step 2: Press the power button to turn on the product. Some models may require pressing and holding the button for a few seconds.

Note: Find the power button on the machine. Usually, this button is located on the control panel or near the digital display.

Step 3: Once the oil-free fryer has been turned on, you must set the desired temperature and cooking time. Most oil-free fryers have knobs or dials for adjusting these settings.

Step 4: Some oil-less fryers require preheating before you can start cooking. If your machine requires a preheater, preheat oil-free fryer for a few minutes according to the manufacturer’s instructions.

Step 5: Once the product reaches the desired temperature, you can place the food in the cooking basket or tray. Close the lid and set the cooking time using the controls.

Step 6: During the cooking process, you can monitor the progress through the transparent window or by opening the lid of the oil-free fryer. Be careful when opening the top, as hot air or steam may escape.

Step 7: When the food is cooked, and you are done using it, press the power button again to turn off the machine. Unplug the oil-less fryer from the electrical outlet.

How to Use an Air Fryer? Using air fryer for the first time

An oil-free fryer is a device that does not use oil to cook food, using only the heat of the air circulating in the pot. In addition, frying food with an oil-free fryer helps to limit grease, make food even more delicious and provide a safe and nutritious meal for the whole family.

How do oil-free fryers work?

The oil-free fryer operates on the principle of vacuum frying with a heating mechanism. The heat source from electricity, combined with the convection cooling fan, circulates quickly throughout the surface of the food to help the food cook in a uniform hot air environment. Featured is the Rapid Air technology that makes the air circulate quickly and powerfully. At the same time, the heating element emits infrared radiation that deeply penetrates beneath the food’s surface, resulting in an exceptionally rapid heat transfer. This process contributes to the food’s crispy texture. 

The symbols on the oil-less fryers need to know

On/off button

The power button icon will be visible after plugging in and disappear after unlocking the control panel.

The power button allows you to power on the console. In addition, this button also allows you to pause cooking to prepare more food inside the oil-free fryer, helping to cook all foods evenly.

Temperature up/down button

Thanks to this button, you can easily adjust the appropriate temperature to prevent food from burning due to overheating.

Time selection button

In general, most models of the time and temperature control buttons have the same configuration. Therefore, each cluster of buttons will be placed to the sides so that users can easily distinguish which side to adjust the temperature and which to adjust the time. However, some models use a mechanical knob (without an LCD screen), so a rotary knob will replace the -/+ button.

When adjusting the temperature, each time you press the button, the time will increase or decrease by 1 minute until you reach the time you see fit.

How to install a newly purchased oil-free fryer

The first time you use an oil-less fryer, you need the following:

Step 1: Lift the product out of the carton.

Step 2: Remove the plastic bag and paper on the pot body.

Step 3: Wash the frying tray and rack with dishwashing liquid before use and cover the frying rack and pan to dry.

Step 4: Next, you take a soft damp cloth to wipe clean through the outer pot body.

Preparing to use the oil-free fryer

Step 1: Place the hot air oven on a flat surface. Note that it should be placed on heat-resistant materials such as kitchen countertops.

Step 2:  Install the frying rack and tray in the pot’s correct positions.

Step 3: Unplug the power cord from the power cord compartment at the bottom of the pot.

How to use an air fryer for the first time?

Properly using an oil-free fryer makes the product more durable and safe. It helps the food to be processed more deliciously. Detailed steps are as follows:

Step 1: Plug the pot’s plug into the household’s leading power.

Step 2: Lift the frying pan gently out of the pot.

Step 3: Put the food to be fried into the frying tray.

Note: Do not put the amount of food in the fryer beyond the MAX line. If you add more than the specified line, the finished product will no longer be delicious.

Step 4: Put the frying rack back into the pot cavity.

Note: While the pot is cooking or has just finished cooking, absolutely do not touch the pot’s body. It will easily cause burns, but hold the handle and lift the frying rack.

How to Use an Air Fryer for Chicken

Step 1: Prepare chicken and spices

  • Choose pre-prepared chicken and clean the feathers and internal organs. You can choose wings or thighs if you like because baking the whole baby takes a long time.
  • After cleaning the chicken, rub a little salt on it and then wash it to reduce the fishy smell.

Step 2: Marinate chicken for flavor

  • With this method of frying chicken in an oil-free fryer, we should marinate for about 30 minutes – 1 hour to ensure that the chicken absorbs the spices.
  • Use a sharp knife to cut into the chicken body so the spices can penetrate evenly when marinating. The finished chicken will be more decadent and more delicious.

Step 3: Fry the chicken in an oil-free fryer

  • Once the marinating is done, let’s fry it together.
  • Heat the oilless fryer; when the pot has stabilized, put the chicken in the product. Everyone should line the foil underneath.
  • Adjust the temperature to 200 degrees Celsius for about 25 minutes for the chicken to cook. Then turn the chicken over and spread some honey on the body. Set the temperature to 180 degrees for 15 minutes.
  • When the chicken is cooked, the finished product will have a beautiful golden color and absorb the characteristic sweetness of honey. The soft and fragrant meat is delicious when served with salad or bread.

Note: You can dip it with green pepper salt or chili sauce for extra flavor.

How to Use an Air Fryer for Chips

After preparing the clean potatoes, follow the steps below to get the desired fries.

Step 1: With potatoes, you need to clean the sandy soil, peel it off with a knife, and cut it into bite-sized pieces.

Step 2: Use a bit of clean salt to dilute with water. Then let the potatoes soak in dilute salt water for about 15 minutes and then take them out. And wait for the water to drain.

Step 3: Add cooking oil to mix well after the potatoes are drained.

Step 4: Heat the oil-free fryer at 180 degrees Celsius for about 5 minutes.

Step 5: After the pot is heated, put the potatoes in the pot. And fry for about 15 to 20 minutes. You should remove the tray to stir the potatoes until golden brown during frying.

After the potatoes are cooked, turn off the pot, put the food on a plate and enjoy. You can use ketchup or chili sauce to serve it will be great.

Final Words

After reading the above article, surely everyone will no longer wonder how to use an air fryer. In addition, the above article has been provided by us – Big Sun Cook, with the necessary information for those new to using an oil less fryer for the first time. Hope the information is helpful to you. Thank you for reading this article!

Exit mobile version